Saka Light Cavalry

Saka Light Cavalry
Showing posts with label 28mm Cowboys. Show all posts

Friday, 24 April 2020

Cowboys - First in a Long Time

I think I got these guys with others from Dave D so many years ago. I still have a few foundry mounted and dismounted ones to do yet. Possibly get these done further through the lockdown.

I went for neutral colours for the most part. These will just be add in's to any of the sides that I have painted up but the one in pink is more of a general type whilst the other seems to me to be more lawman.

These were a nice quick paint, I had been suffering a bad headache and at such times I can't read and don't tend to watch TV anyway so painting is one of the few activities that does not seem to aggravate it, as long as I stick to the larger scales.

Friday, 23 December 2016

Secret Santa 2015 Finally Finished


I hang my head in shame as I write today's post. Whilst I quickly made up the wagon and the thunderbox I failed to actually paint the other parts of my wonderful present from last years Santa Clause. But with the Analogue Hobbies Painting Challenge about to start I decided I had to get them finished before this started and with such a dead line started to get cracking.

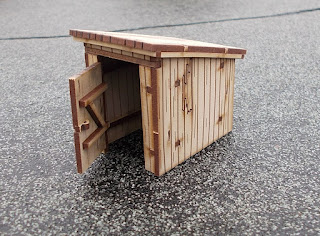
The toilet is by Foreground and is an excellent little model that has already seen some action in a western gunfight I played with The Boy, Lee and his daughter.

The figure was also part of the present, being The Duke I am assuming. He has sat (literally) primed and waiting since I think February. Not the way to say thank you for such a nice gift.

Colonel Bills do a few different figures to be mounted on the loo, I really like this one though Dave D has done another option as part of his first entry in the Challenge.

The other part of my present was this Foreground wagon and a pair of resin loads also from Colonel Bills.

The fact that the loads painted up really quickly just made the long wait so much worse! I need to get my buildings all painted and so get more games played as they always go down well with the kids.

The loads were given a mix of wood paints (and a leather belt!) and then a black ink wash to bring out the grain of the cases. I am really happy with how they came out.

The second load is shown outside the wagon. I will obviously need to get another wagon so as to be able to use both loads, see an easy excuse works wonders.

So thank you to my Secret Santa from last year and again, sorry it took me so long to get my brushes out.

Monday, 5 January 2015

The Kids Cowboys

Way back in 2013 I think, Dave D sold me (well lets call it gave me) a bunch of western figures including a bunch of Foundry mounted and dismounted cowboys and whilst I painted up almost all the other figures I got from Dave I had not got round to the Foundry stuff so I finally got this sorted out in time for the second bonus round.

This one is my Daughters, two things give that game away. First he is on a white horse and secondly he has a red bandanna that a number of her cowboys happen to have.

These are both chunky and heavy but have plenty of detail. The glasses gave me fits! The kids both picked figures that had shotguns, their favourite weapons by far.

Actually the dusters also tie them in with her gang. I am still in shock over her desire to take the bad guys over the Sheriff. As he looks a gambler I guess he went to far in a poker game and now runs with the bad un's

My son went for an obvious rancher type and would fit in with his towns men or indeed also fit with my cowboys. Not sure he would lend me them though.

Again the trusty shotgun. I still have about eight more double figures to paint up and whilst thy may be after the challenge has finished may get painting time alongside the Mexican's I need to buy.

I really need to get round to painting up the towns buildings, especially as I plan to buy a building or two at the next show I go to. Funny how side projects suck up time and resources but it's always a favourite with the kids.

Friday, 26 December 2014

Santa Clause and Secret Santa THANK YOU BOTH

Whilst I had a quick look yesterday at blog land I have only today been able to post and I want to say a big fat Thank You to both by Secret Santa and Santa Clause. Both presents are great and will get some use.

My Santa Clause gave me this very nice Dio of a prospector and his trusty mule. These look wonderful and the colours are perfect. I really like everything about them.

Bags of character and detail, and as they are also on separate bases these can pop out and be used in games and split up allowing for much fun I am sure.

I can see the mule also making it into the roleplaying given the desire to carry so much equipment the two ponies they have may not be enough!!

If that was not enough I also was given this great Mexican. I don't think I have  mentioned it her but I was planning on putting together a Mexican force so this guy will fit right in and I cab see I will need to start thinking of suitable characters to go with him.

The figures are all from Blue Moon so I will start there as I really like the look of these figures. I know Spirit Games sells or has sold these ranges so maybe a visit to Burton is in order?

As you can see, he is packing more than just the two pistols he has by his sides :-) I think before the week is through he could wind himself in a shoot out as the kids try and kill Dad, something of a tradition in our house.

My Secret Santa was no less a welcome present. Three Plastic Soldier Company T34's which is just perfect as I am currently painting up the Russian infantry that will go with them. No I did not peek, just very lucky to be working on them on the run up to Christmas. 

My plan now is to finish them and also start the assembly and painting of the three tanks so that I have my fledgling force all done and ready for a game when I get the chance. Even so I will still need to add some support to the force being very light in this respect but that's all part of the fun. So I will be doing quite a bit of internet browsing as I rally want to do these guys justice.

Again thank you to both of you, both presents hit the mark and from reading some of the blogs I was not the only lucky one.

Monday, 8 December 2014

Warbases Horses

I have finally got round to painting the 28mm Warbases horses that I bought way back and of course they took no time at all to paint up making the delay the more unforgivable. These will allow either the stage coach or the wagon to move in a cowboy game opening up all sorts of possibilities.

These are £2.50 each which I think is a little on the high side but saying this you do get a fair bit of lead and I have to stress that I have not tried comparing them. They go well with the Warbase stage coach so at the end of the day I am not moaning and am happy with the money spent, just not used to 28mm costs I am guessing.

I am fairly sure a set of moving horses are in the pipeline as well as the luggage and crew for the stage coach so I will be getting these as well so you can judge for yourself how the price effects me LOL.

These were painted pre-challenge so do not count towards me score but did get another PLUS off my score board for the lead mountain so got to be good. In fact expect the mountain to sustain a good number of body blows throughout the coming weeks as I rip chunks out of it yep fighting words.

Talking of the challenge I have my first submission in and I have almost finished my second one meaning I will have scored over 100 points in the first week but it is bound to slow down as I have a number of other projects as well as real life to cut into the painting time. However I also have a good number of posts planned so that the next three months will not just be a steady flow of painted figures. Though traffic is down some especially Friday as everyone seemed to be doing painting bingo. Eyes down for a full paint job.

Sunday, 26 October 2014

Pioneer Wagon - Warbases

Ok the last of the current run of posts on the wild west is this Warbases Pioneers Wagon kit at £4 and again it's a quick kit to make up as you would expect for it's size and number of pieces.

Nothing much for a paint job just flat brown for a base coat followed by a bit of Iraqi Sand (both Vallejo) drybrushed on to give a bit of depth to the colour.

I added a bit of linen cloth to give it a cover. I may go back to this and paint it off white and if I had thought about it would have stained it with tea at the time.

Like most MDF items it does not stand close inspection but it's fine for street furniture for a fun game. Mainly being for the kids I am not too hot about doing the best finish and it's more about getting things game ready than making them look great. Saying that I am not unhappy with the results.

I think when I took the photos I had not painted the wheel rims as they look rather brown. Action shots later will show I did actually paint them up.

The cowboy collection is really coming along now. We have plenty of figures for a reasonable sized game and still have more buried in the pile, though I cleaned up a few and undercoated them a month or so ago so they will get done in the not too distant future. I will also continue to paint up the buildings and I hope to get another done end part of this week though being away with work a couple of days will put a spanner in the works.

Thursday, 23 October 2014

Dead Man's Hand Cowboys

I found another two prepped Cowboys a few weeks ago so I slipped them into the painting queue just to get them out of the way. I did not get them varnished for the game on Monday night so they have yet to get on the table.

I just did a basic job on them, single base colour and an ink wash. That said, on this guy I added sweat stains as the light blue shirt looked vulnerable to such.

Nothing over fancy with the figures but I like the pose and level of detail. Both figures will either be used by the kids or can make up my group when I get to play against one or both of them. 

This figure has the least detail showing of all the Western figures I own as the long coat covers mose of the figure. Still he is just cannon fodder anyway.

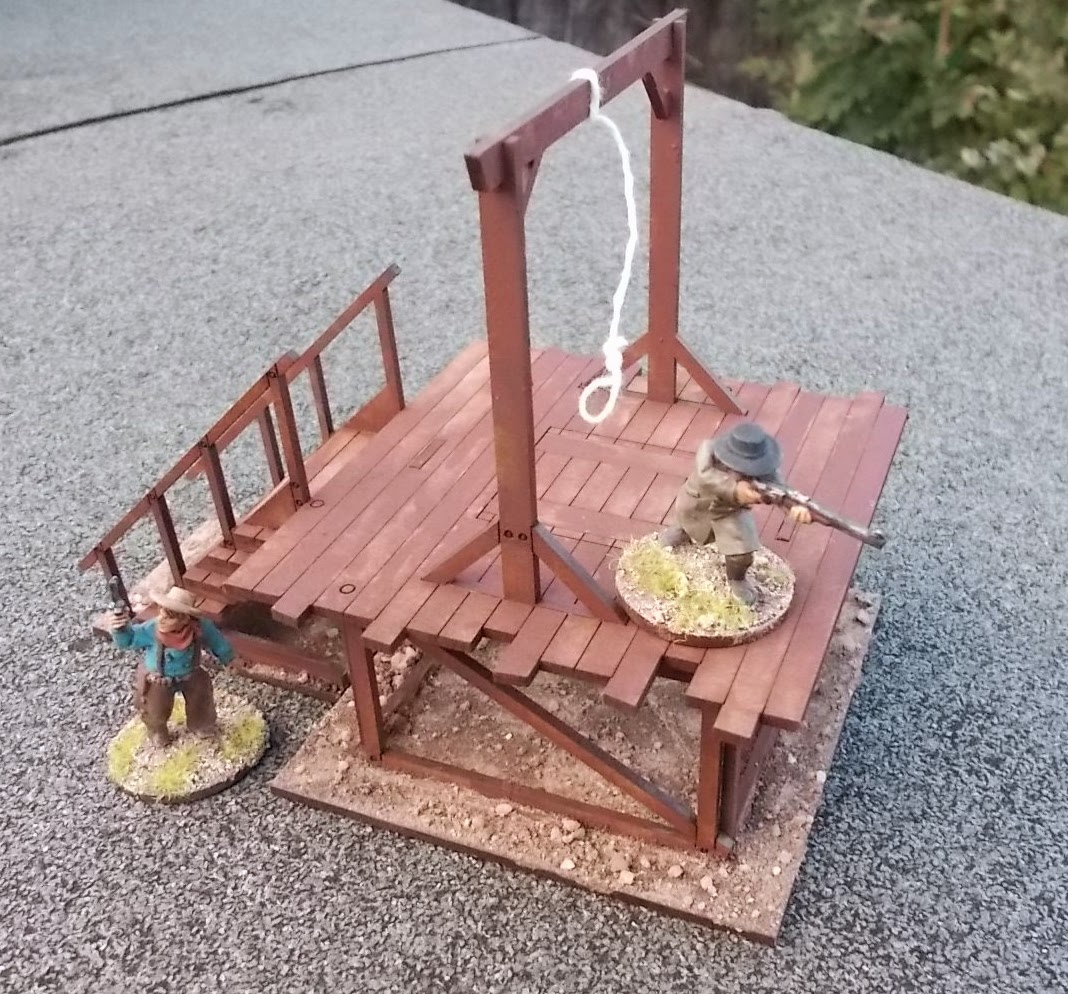
Lastly a shot of the new guys with the gallows to help give you an idea of scale of the gallows. Quite a large piece and does gain your attention.

I just need to clear the table of the six Prussian Battalions and a few other odds and ends then I will get my Santa Clause finished, want to do a good job so that it looks the part. Talking of Christmas all Secret Santa's should now have their targets, if you do not then get in touch with Cath if you have her email,, if not let me know and I will pass you over.

Wednesday, 22 October 2014

A Western Theme - Structure (Building) of the Week

For the next few days you will get a series of posts that all have something to do with the kids Cowboy collection. Today you get a slightly changed building of the week in this Sarissa Precision Old West Gallows (DO41) and costs £7.50 


Like the Sarissa Precision building I built this is an easy kit to put together and painting was easy as lets face it it's just the one colour. I did not want to have the wood looking faded like the buildings as I was working on the principle it's not been up as long as the buildings but still allowed a little difference in the planks for interest sake.

It was really windy when I took the photo's so the noose was being blown around making it hard t see Cath's good work. I am a little worried how quickly she was able to knock up a working noose. Defiantly remembering her Birthday!

We have already played a game using both the building and the gallows. My daughter for some reason loaded the platform of the gallows with men rather than taking to a house. Lots of fun was had and once I have all the buildings finished expect a few protracted shoot outs.

Saturday, 11 October 2014

Building Of The Week Sarissa Precision Old West Store

Well 7 days without a post, sorry about that but I have been so busy at work on a computer that I was just not able to get it together to sit in front of another computer. Fortunately I have still had some time for hobby related activities but less so than normal. I have still managed good progress into painting Hougoumont with both sets of buildings having the walls and roofs worked on but have now put them to one side to allow me to work on the Prussians which are half way through being cleaned up.

Last night I started work on one of the buildings bought last weekend, this is Sarissa Precision D001 Old West 28mm (£8) and is the smallest building they do for Western games. I bought 3 different versions though they all have the same basic shape but the doors and windows are different. They also do a small Plus version that has a veranda I will possibly buy one or two of these next time.

And more I am sure there will be, as they are a good value do it yourself alternative to the excellent 4Ground buildings, though of course much simpler in their offering. As these are for use with the kids (me and Lee will hijack them every now and again) I wanted to inject a little humour into the buildings so here we have somewhere you can get a replacement gun should you find yours keeps missing the target.

The building has one small window on one side which can be placed on either side of the building. I washed the walls with watered down Mahogany (70.846) from Vallejo which gave the desired weathered look to the sides. My thinking was that the owner would try and keep the front of the building in better condition than the sides or rear.

My only bugbear of the whole model is the back door. It's actually wider than the two doors at the front added together. Not a deal breaker but an unnecessary gaff in my opinion. Of course I made it worse by painting it bright colours, oh well.

I painted up the back of the sign and roof a fairly none de-script grey, I think I may add a thin wash to it but in real life it's not got the bright look it seems to have here.

Nice to see the floorboards on the inside, again I may do some more work on these with a wash of ink that will bring out the wood a little better. I gave the inside four coats of Foundation White as I wanted it to not look too dark when the roof was on. Seems to have worked so worth the extra time taken.

Have you spotted what's missing? yes it's the back door on the inside, just like the missing front doors. It's one of those things that I think would be worse to try and paint in rather than leave blank. If I can pick up some door blanks I will do so and add them to the rear of the buildings and then I would consider painting in the doors.

Don't take the whole door issue to much to heart, when a building is just £8 you can accept such minor issues though at least the door width could be easily corrected. Sarissa Precision is based quite local to where I live so it's nice to see them doing so well. Their full range is large, even the Western has a lot of variants that would make a large town if you so wished, though actual houses seem not to be over optioned to say the least.

So can anyone come up with a few names for some of these buildings, I am thinking Custer's General Stores, Lynn Seed, Dry Goods but can you give me any better?

Don't forget still time to join in the Secret Santa and Blog Giveaway, see the previous post for links.

Sunday, 21 September 2014

Warbases Stage Coach

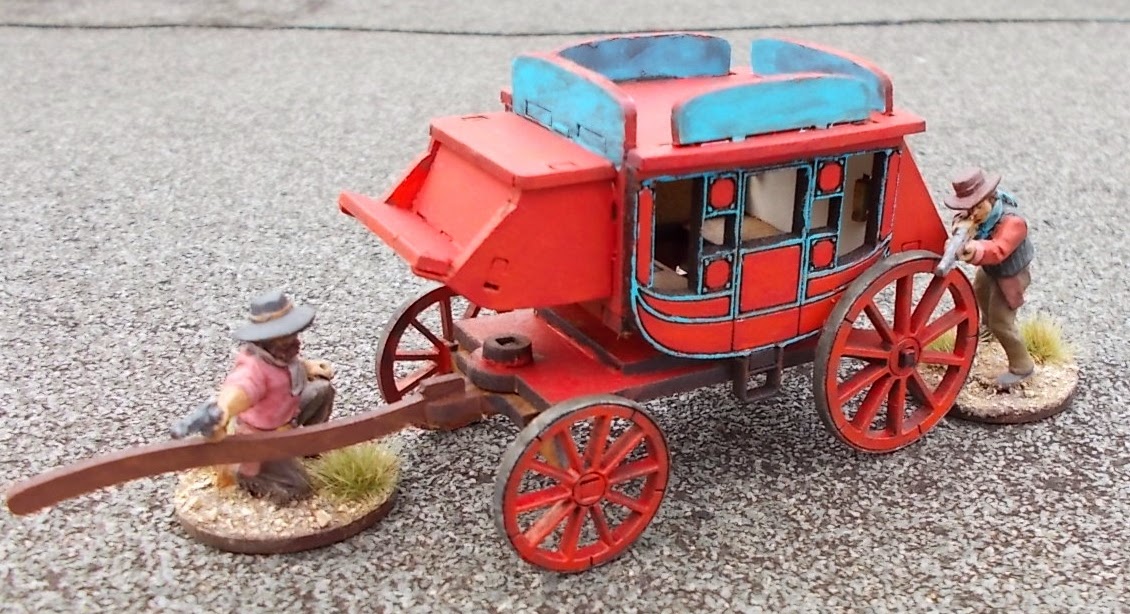
I left my glasses at work the other day but was really in the mood to get on with something so I thought I may as well start painting my Warbases Stagecoach. This is a nice kit costing a reasonable £7 and goes together easily, though it would have been that little bit easier if I had the instructions but I did not ask for a set when I bought them at Partizan (no not the one from the other weekend).

Being for the kids collection I wanted it to be a bit bright. The base colour was Vallejo Flat Red but with the wood soaking it up it was a tad dark so I added a thick wash of Scarlet which made the red pop.

The front wheels do swivel which was a surprise as I am not known for my finesse. This is all down to the clever little mechanism you can see under the drivers seat.

I painted up the red quite quickly so without the aid of my glasses tackled the blue, not sure what I was thinking but the etching that Warbases put into the detail made it straightforward with only a small amount of touching up with the Scarlet.

The wheels I painted in Oily Steel and then added Games Workshop Nulin Oil wash to dull it down further. I did the same on the blue boards as they were eye watering bright. If I had taken more time, painted the interior before assembling and used filler where required I could have made this look even better but as it is I am satisfied with the result.

Thursday, 24 July 2014

Cowboys Double as Bad Guys

To fight opposite my sons good guys my daughter needed more support and so she gets to use the first three cow hands.

These again are Dead Man's Hand figures (I think) and again have nice poses though all three are action poses which suits their use.

My daughter was convinced that all three have ripped their trousers and showing their underpants LOL. I am reasonably pleased with the pinstripe type finish on the waistcoat. 

I have painted up the rifle as a Winchester 1 in a 1000 thought he gold/brass plate looks a little yellow on some of the photo's/ 

This guy has yet to put on his shirt, longjohn's in plain sight! I thought the girl would like some pink and he seemed the obvious choice.

More split pant's, Lee who told her that they were split has a lot to answer for :-)

Another one with raised rifle, similar pose but with a few differences such as angle of the head though all three are wearing chaps.

A fairly basic paint job on all three but a lot less use of ink and washes than I would usually do. This allows for ten per side game or as we have 21 figures painted up we could go seven a side, that would be interesting.

I have a few more DMH figures and a lot of Foundry which need to be cleaned up and got onto the painting table. Of course I have a lot of stuff sitting in that queue.