The French continued to keep both bridges under pressure but was looking less likely to cross over. Prussian reserves were moving towards the twin spanned bridge in a bid to force the French back.
Further towards the centre the French were now very much on the defensive, Lee was trying to be aggressive over the majority of the battlefield, so far I had been able to repulse all attacks but not of these attacks had used the full force of the brigades engaged.
Lee's attempt at the twin arched bridge had left his attacking force in disarray, here two battalions are under retire orders (yellow die) leaving the available troops rather exposed. Lee was having some shocking rally rolls.
At the central position Lee's Saxon troops were still at full strength, these troops started to move in for the attack. Being the only full strength Brigade left of Lee's at start on board troops. My Prussians facing him was also close to full strength.
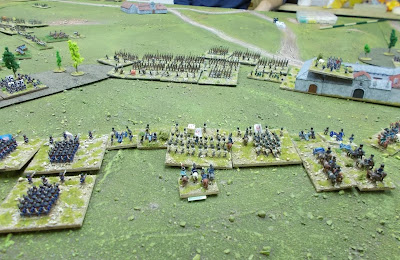
As can be seen my troops facing the Saxon's has their left flank drawn back though I have two battalions in the woods and a cavalry regiment poised to charge into the flank of the attacking Saxon's.
The French facing the rightmost Russians were also starting to move forward along with a couple of cavalry brigades. Up to this point most combat in this area had been our artillery taking pot shots at each others infantry.
Fresh French troops on my left are again moving forwards after the previous testing attack had been beaten back. This one looks a lot more determined.
On my far left Lee continues to push troops against the farm and hill. This attack has had troops fed in a few at a time and has never really got going but is taking a steady toll on both sides.
The Italians attack across the small bridge again in the face of my weakened forward troops but I still have very strong reserves to commit against this attack.
However I did not need to bring in these reserves as the forward units were able to rout the single battalion. I really want the Italians to at least stay in this corner. I need to break through at the next bridge and then launch an attack on the Italians from two sides.
The Prussians gathering for an attack across the two arched bridge. With more than double the force of the French we have a good chance of forcing the crossing.
I manage to slow down the Saxon attack by charging my cavalry at the flanking battalion forcing them into square (red die) but that will not stop the main body from continuing the attack.
A view of the Russian positions, the Guard Cavalry are to the left bottom corner and are making their way to help out the Prussian cavalry fighting off a French cavalry attack.
One of the major attacks of the game finally kicks into gear. I have less troops but fighting in cover of the town should reduce much of the advantage Lee has. I also have reserves that I plan to plug gaps and counter attack where required.
Another turn ends with me feeling quite confident in the way the battle is going. I am about to go onto the offensive in the Prussian sector whilst the Russians look to be capable of holding the French off until the Prussians can help.


This just amazes me, fabulous stuff Ian.
ReplyDeleteGlad you like it Michael, the games been a blast
DeleteIan
Intense and beautiful, mass effect is very impressive...
ReplyDeleteThanks, it really got intense as both sides were starting to loose formations at the end
DeleteIan
Very inspiring stuff Ian.
ReplyDeletePics like these are what have gotten me started on our 6mm ECW project
Our 6mm ECW is much smaller than this, well at the moment lol
DeleteIan
Excellent presentation. I am really enjoying the buildup
ReplyDeleteCritical mass just round the corner
DeleteIan
Such a good looking game.
ReplyDeleteFMB
It's delivered as well, lots of difficult choices on what to activate next etc.
DeleteIan
Wow that is 1 impressive battlefield Ian!!!
ReplyDeleteThanks, not sure what will be the next game now.
DeleteIan