Saka Light Cavalry

Saka Light Cavalry

Thursday 20 September 2018

Commisioned Work

A fair few of you will be aware of my hobby crossover into Advanced Squad Leader (ASL) especially the sniper reminders that have popped up on occasion. However it came full circle when a friend asked me if I was prepared to paint up a trophy for a new ASL tournament he and another friend were organising. At first I was resistant having turned down the chance for doing the same for Heroes a few years ago.

However Martin's enthusiasm got me to waver and eventually I went from a bit negative to fully onboard. We actually got the idea from concept to basic positioning fairly quickly. From there it became a case of tinkering as we went.

The setting is somewhere in France 1940 as the Germans tear their way through the allied armies on the way to another blitzkrieg victory. Martin wanted African colonial troops to be depicted and even beat me to finding the Senegalese infantry that Warlord supply as a boxed set. I then added the tank and crew also from Warlord whilst Crusader provided the French ATG and Black Tree Design had the German casualties I wanted.

The rough idea actually changed little once I started to paint the bits up. Above was the photo I sent to Martin for his thoughts. To be fair he more or less left me to my own devices, never saying no but giving encouragement in line with his own preferences.

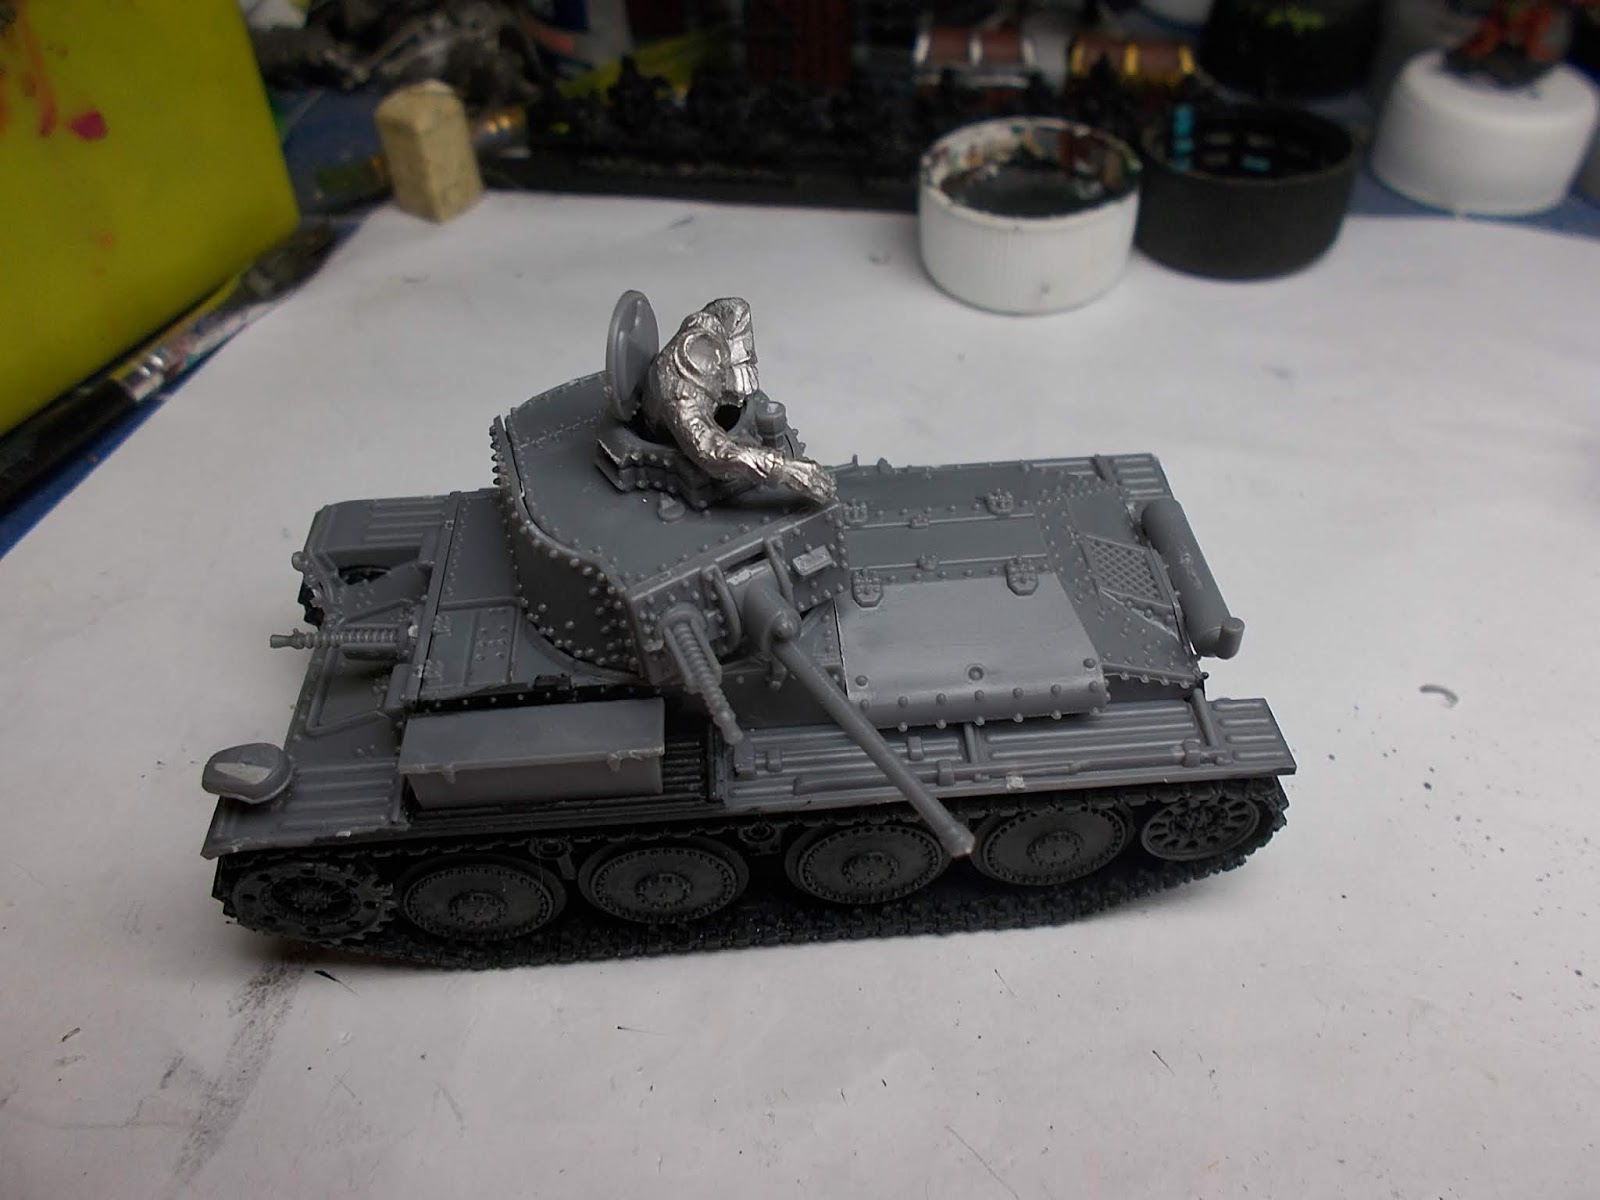
I had bought extra crew even though it comes with crew. However my plan was to have the tank knocked out so needed to make changes to the crew member bending the arm down and cutting some of the figures side and stomach off to allow him to be draped out of the turret. Not something that would have worked with the plastic figures that were too set in posture.

Crushing the gun was a bit of a challenge as the shield comes in two parts. In the end this was actually a bonus as it allowed me to bend one half out of true but still link the two parts to the barrel and trail.

I commissioned Warbases to supply me with two special sized MDF bases so I could play about and see which would work the best. Given the price I was charged it was a no brainer and even though they had a show literally days away I got the bases so quick I did not have to break stride. I wanted the MDF base so I could do all the basing and not have to worry about making a mess of the wooden plinth it would eventually be fixed to.

I also had to convert the standing and kneeling crew of the ATG which for the most part was a case of cutting bases off and filing one side of the figure down so it could be painted and then pressed down into the basing paint prior to sanding. I also made shells and empty shell cases out of cocktail sticks. I also made a ammo box with a couple of shells in it.

I added a little damage to the tank via a glancing strike on the turret (tap drill scored mark) and a pair of drilled penetrations. The killing shot though was registered to the side of the drivers viewing slit.

I also added some cast aside weapons from a German sprue again Warlord Games, also added other scatter such as a cast aside helmet and the guy who is seen with the LMG near him has a ammo belt around his neck and ammo box beside him. I added Games Workshop Stirland Mud into the areas I had scraped the basing paint marking the path of the tank as well as on the various parts of the tank you would expect mud. Finally adding some gloss varnish into the trail and parts of running gear etc.

The total cost of models etc but not paint came to £95 so added up quite a bit as I went on but overall I was really happy with the effect and would be happy to do more such bases in the future.

Thursday 13 September 2018

Dungeon Saga Heroes

As I continue to paint what grabs me rather than for a set project I decided to paint up the heroes from Dungeon Saga. I will also be doing the bad guys as well. Not to mention the furniture...…….

I have taken the player characters off their stone effect bases and added them to acrylic ones. The bad guys will remain on the original bases. First up is the wizard. I tend to mostly go for bright colours with these guys when I paint one and felt no issue doing so this time round.

The details a bit faint so harder to paint than say a typical metal fantasy figure. However for a game piece it's good enough.

Next up is the barbarian figure. Originally I was not all that struck on him but once I had undercoated and added a white drybrush I started to see the detail better. He is typically overdone with skulls, something that again I am not over keen on miniatures.

You may have spotted the doors and of course the chest, pieces that come with the game but could find use when I finally get time to run another roleplaying session with the kids.

No party can really be called a party without a dwarf! Suitably OTT I got to play with a good mix of metallic paints. 

Again like the others he did not take a great deal of work but of the four he is most defiantly my favourite. 

No decent images came out of the elf unfortunately. I was unable to get a pic from the front that was not blurred.

Group shot to finish off the set. In the background you can see the yellow skeletons that will be the next figures from the game awaiting primer. However I do have other figures already on the go. Hopefully I will get those further down the line during the next week, not that I don't have a few more units awaiting photographing.