
Managed to get another playtest of the rules again yesterday, this time two major changes. First it was against an opponent (Andy) and second we went large to see if the rules could stand up to something with mass (around 30 units per side). So we took this to Maelstrom Games as they have nice sized table.

I had a rough idea of table layout and it worked out roughly as I had in my head. A small town on the Prussian far left with a woods close to town with a farm and fields on his right. A few small hills dotted around and a large hill on my left with a small woods on one edge of the hill. VP's were awarded to the farm, the town and the large hill with a waggon each also worth a VP. So with Andy at start holding 4 VP's (town worth 2) and me holding 2 I was forced to attack.
We each gave orders to our formations which held all game such was our excellent planning. Orders can be changed if desired either the Cin-C sending a courier or formation commander using his own initiative. I held out a couple of rules that are chrome but these would work when added.
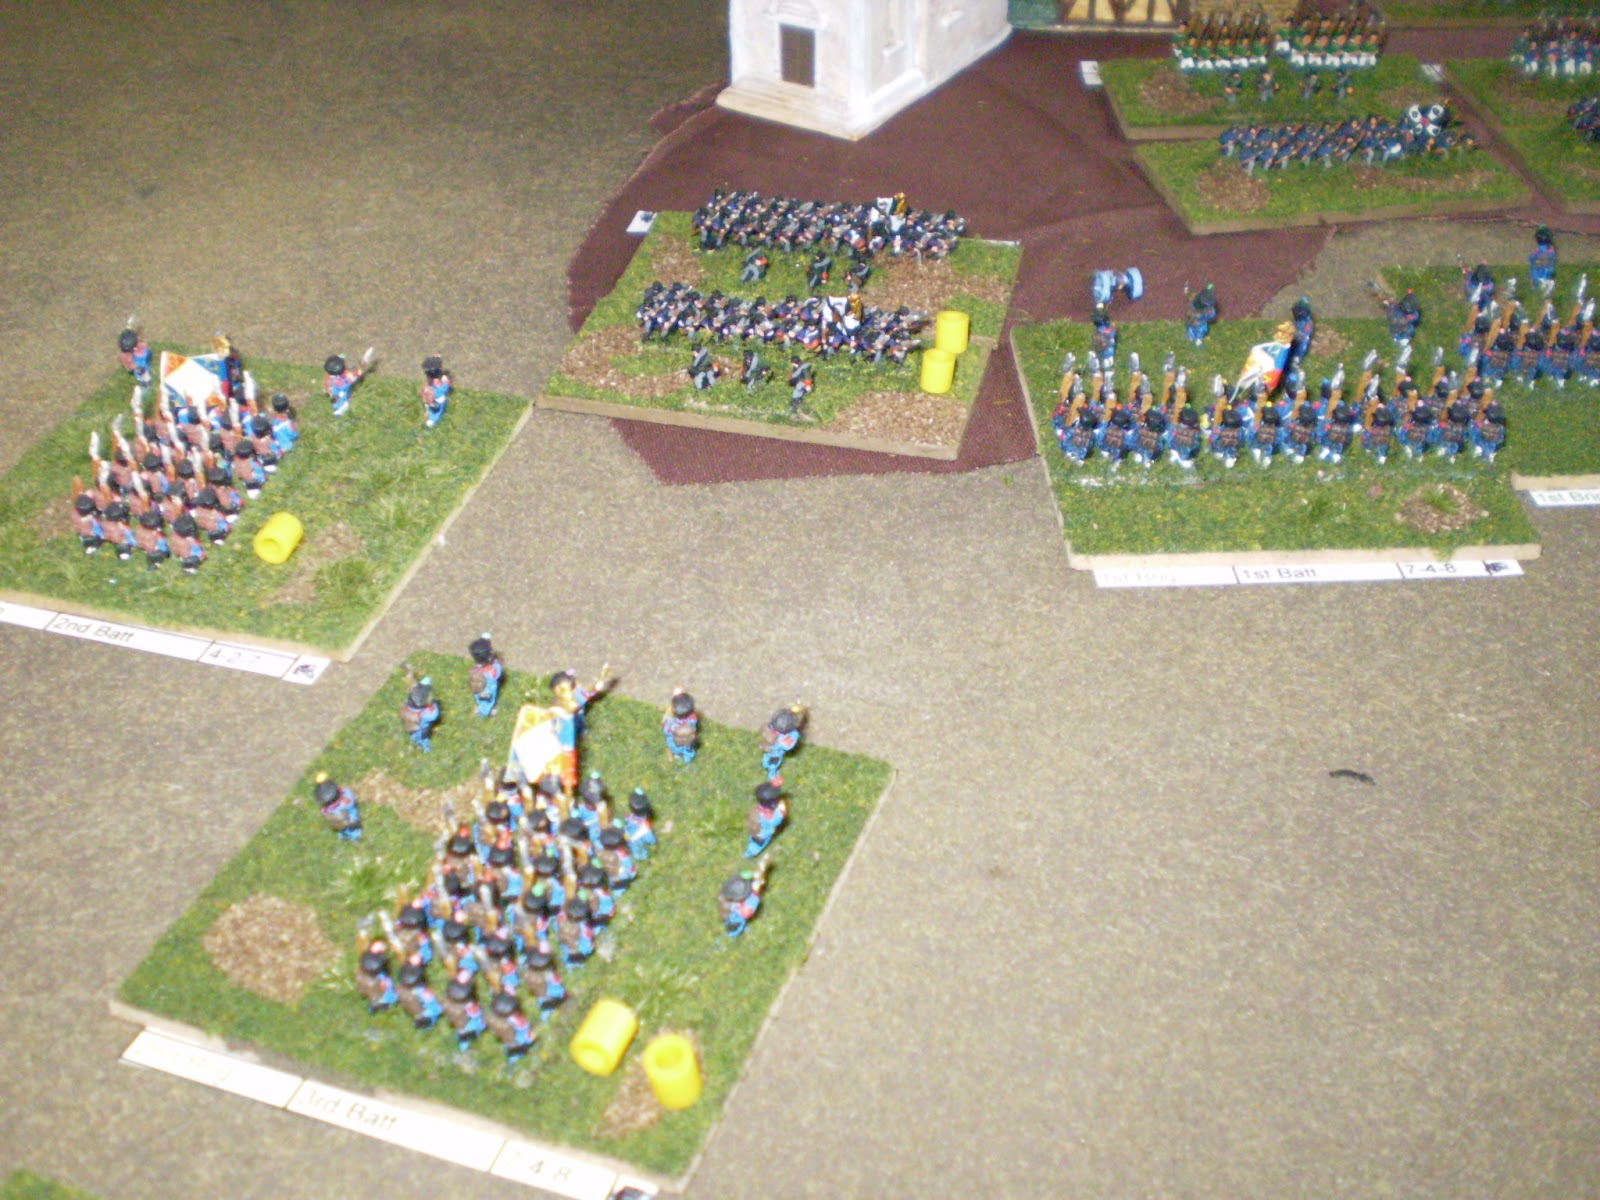
Andy had put all 6 Cavalry units on his left flank whist I put four on my right and four in the centre. My largest infantry formation was placed ready to attack the town with my smaller (but still large) formation was to attack the farm and defend the hill. Andy had gone wide on the right with his foot so it was obvious that as I attacked the farm I would be at risk on my flank. I also had reason to be worried about the Prussian Horse on my right as three of those regiments were Ulans with pointy sticks.
First blood though well to me as I forced a cohesion check on a Hussar Regiment which rolled a natural 12 for an immediate rout thus saving my Hussars who was at that point losing the melee. Justice was soon administered as I too rolled that boxcar!
 |
| Red means Rout! |
Another case of looking to win the round turns into disaster. A hole appeared in my lines and routers do not come back! at least I had caused a drop in Cohesion (yellow marker) which can be recovered from if you stand and pass a morale test.

Mixed results on my right as the Hussars of both sides clash. We both take a two level drop in cohesion in separate melee's. Two levels of cohesion loss effect your ability to shoot or fight whilst you get a bonus in melee for having full cohesion. The rules are more concerned with morale than casualties, units fired on tend to loose cohesion (mix of casualties and loss of order through those casualties) and possible drops in morale. Melee is much more blood thirsty with cohesion often dropping two levels and morale dropping in a good number of cases.
I wanted attacks on towns to be difficult and fortified positions more so. Yet to try out fortifications but in the last game had mixed results in the two attacks I had. In this game it was a much clearer picture as a lot more units got involved. Here we have one attacking regiment thrown back in some disorder whilst the defender still took a lot of punishment due to the supporting unit in the attack (the supporter then automatically engages the winning defender in the next round of combat. I have the choice of trying to reorder my attacking regiment or sending it in again as is. The regiment on the right attacked the guns winning the combat with ease (guns in melee have huge disadvantages ad will loose almost all melees)

The bigger picture of the struggle for the town. Musket fire from the town had done little damage whilst firing into the town was doing me no good at all. Cold steel would have to be the order of the day.

Andy failed to form a couple of squares either due to poor rolls or my cavalry being to close, this allowed me to charge infantry not in square which was not pretty. Well it was for me, as I routed a couple of units though one Chasseur regiment was forced to retire until the formation commander joined them and brought them back and restored a cohesion level. These breaks gave me breathing space on my left and centre though Andy continued to move forward in this area trying to overpower the four regiments.

Not that a few routs in the centre could make up for this! Three of four Hussar regiments in rout and the fourth forced to retire due to it's formation being broken. The unit was still at full strength having just routed the second Hussar regiment but that means nothing when your formation breaks. Andy now had three Ulans and a single Hussar to attack the rear of my attack on the town which would be unwelcome.

In my impulse I turned my guns so that they could give that last Hussar a taste of canister. As the Hussars had already moved it would be up to who moved first in these two formations in the next turn. Both of us had pressing needs on who to move first (turns are played out similar to Impetus) and I really wanted to take advantage of the situation in the centre whilst Andy saw this as the must win area).

The battle in the town was far from concluded at this point. I had pushed a couple of units out of the town but in turn had others sent packing. Andy did a great job of feeding fresh units into the battle whilst I failed to set about recovering cohesion so had first lost momentum and then started to loose the fight for the town.

This was the breaking point, the defending unit routs in a single round a conscript regiment and badly mauled the supporting line regiment all for a single loss of cohesion. Attackers get a +2 for attacking into a built up area which makes the attack so much harder.

The battle twisted and turned in the town with the attack as units that had won their combats then turn to fight each other. In the background you can see two Prussian regiments retiring due to cohesion loss (white markers mean retire and they can be brought back) Also in the background can be seen a Prussian regiment that would in the next turn support the attack on my lone French Regiment.

Two fresh French Regiments make their way to the left of the town in preparation to attack from yet another angle whilst one regiment is retiring and another is close to retire or break so needs to stand and reform but with the Prussian cavalry on it's way it has little time to spare.
At this point I managed a fluke breaking of a unit covering the farm which would allow me a great advantage on that attack. The squares were now facing infantry attacks which would have a great chance of breaking them whilst the cavalry attacked units out of square. It looked like the farm would fall whilst the Prussians planned to attack my hill but with about even odds and I having the advantage of the hill and possible reinforcements as the farm cracked it looked to be a desperate grab. However the town was not going to fall to me, Andy had enough troops left to hold off most of the attacking regiments and his cavalry would fall onto my rear and roll me up as he had smashed the cannons after they failed in a canister volley to halt the charge and paid the price. Nothing was stopping Andy rolling up the flank. We called it there as a draw but in fairness given time I would have been forced off the table.
Conclusions. Well first up we had a bloody good time which was a relief as the game could have shown up such major flaws that it was unplayable and an early bath ensured. It did feel like a Napoleonic battle (the main aim of the rules). Andy showed that having fresh troops in the right position will turn the tide when the other player (ME!!) fails to do so. It had ebb and flow as each side took a breath and tried to reform and after a few turns is started to be really important what you tried to activate first.
Of course playing a big game also showed up more flaws(an intention of the playtest of course). We both felt guns need a bit more sting which is a simple increase of their firepower. disorder still needs a lot more adding to it as it's in the early stages of getting them sorted. The original commands need more detail and loop holes closing in the support order. I also want to try adding a bit of spice where the last formation to be activated does not get activated making it all the more important to get the best units moved. We did a fix in progress of the Artillery receiving a charge, it gets to fire canister at the charging unit. It will not stop charges from better units but can inflict enough damage that you think about the attack a bit (artillery are removed if it does not win the melee and has little chance of winning). The same fix will be added to French V British for the renowned Musket use of the Brits, this should make attacks really interesting now! I also have to add a couple more columns to the fire and melee tables. Overall though far more of a success than I could have hoped for. Now all I need to do is start work on the army lists for further structure.
Looked and sounded great Ian which is what we want in our forays into wargaming, nice one!
ReplyDeleteThis is an enormous amount of work Ian, but as you said it allows you to tweak the rules for a better gaming experience. Nice report!
ReplyDeleteOkay Ian, you said I should go ahead and put my name in on the give-away. So put me down for the brushes please!!
ReplyDeleteA very nice battle report, nice one!
ReplyDeleteA fantastic read, thanks!
ReplyDelete