
My worst fears were realised when the two Chios armies converging on my most southern army looked to join up. I would be facing two 300 point armies with one a little over 400. I had used some of the spare points I was carrying to buy another Companion Cavalry unit which proved a wise choice.
It was also a great opportunity to try the rules with my 6mm figures. No photo's as most of the troops were plain MDF bases but I can tell you that once the figures are painted then it's going to look fantastic. You really get a feel of a big battle and the simple act of turning inches to cm worked really well.
After throwing a few dice about I ended up facing one of the two armies coming from one table corner whilst the other would arrive on the turn after rolling 10 on a D10 with a +1 per turn past.
The Persians command roll is just 7 so it's a real difficult army to drive forwards and whilst the Macedonian armies command is 8 it does make a difference. The Persians made for a small hill with the idea of standing their Hoplites and Levies on the top and holding off the stronger and more numerous Macedonian's until support arrived whilst the cavalry tried to do as much damage to my cavalry as possible.
My plan was to hit fast and hard against the first army and then take up defensive positions against the second army and try and get as many units back to near full strength as possible before fighting the second army. The last thing I wanted was to be caught between the two though this strategy was actually putting me right there if I did not break the first army.
It started really well with my breaking one cavalry unit quite quickly, this was followed by a second soon after but the light horse was much harder to bring to heal and had a nasty habit of disordering or forcing them to retire. If that was not bad enough the second Persian army turned up on turn three.
I needed the foot battle to end quickly so I could reposition but whilst I managed to beat the Persians to the top of the hill (thank you 7 command rating) the clash was not immediately in my favour. The cavalry battle still was not any closer to completion and my units got closer and closer to shaken. I managed to finally get the advantage on the hill and defeated half the original infantry but the rump was trying to fall back on the slowly advancing friends. I had a lonely heavy stone thrower on a hill and that was able to cause more than a little trouble for the marching army. Their peltasts took a bad test and disordered three other units forcing a turns delay on their advance. It also saw a couple of skirmish units break off and move towards the stone thrower and these were able to take it out later in the game.
I had a great command roll catching up with the withdrawing infantry and broke the division and with it the army. Now I needed to swing around to fight the fresh army approaching my flank. My cavalry by this point was not in great shape and would no way be in good order for when the second clash came. My infantry however were mostly in reasonable order but some units would benefit from a few turns rest but this was not to be. The second lot of levies had more about them and the light cavalry were not being harried by my cavalry so were able to keep adding to my stamina loss right up to the clash of units. It was at this point the battle really started to break down, I would win one combat only to have a unit pushed back adjacent to it. Both sides kept throwing one more unit into the fight to prop up a unit approaching shaken and it finally started to tell on my units as one phalanx was broken. I even threw in Companions on stamina loss of 4 into one combat just to pin them in position so another fresher unit could charge another unsupported unit. Another unit of mine gone but at least the Persians no longer had any reserves fit for throwing in again.
It was a close ran thing with my army having three broken units and three shaken and just about all other units close to shaken. The second Chios army was badly beaten up and it's units still able to attack were being surrounded and the only option was to fall back out of the trap and give up the field.
It was great fun and after feeling really confident post wrecking the first force was really getting worried regards losing the battle. As it was it was rather a Pyrrhic victory as the cost in points to get this army back in order has drained my reserves and as such I will start the next battle with one unit shaken and still one more turn away from getting any more revenue and guaranteed one more battle to fight.
Situation at the end of turn four. Both defeated armies forced back to cities they are masking and now fortunately separated, neither army will be able to support the other in the next round of battles and I will have the advantage.
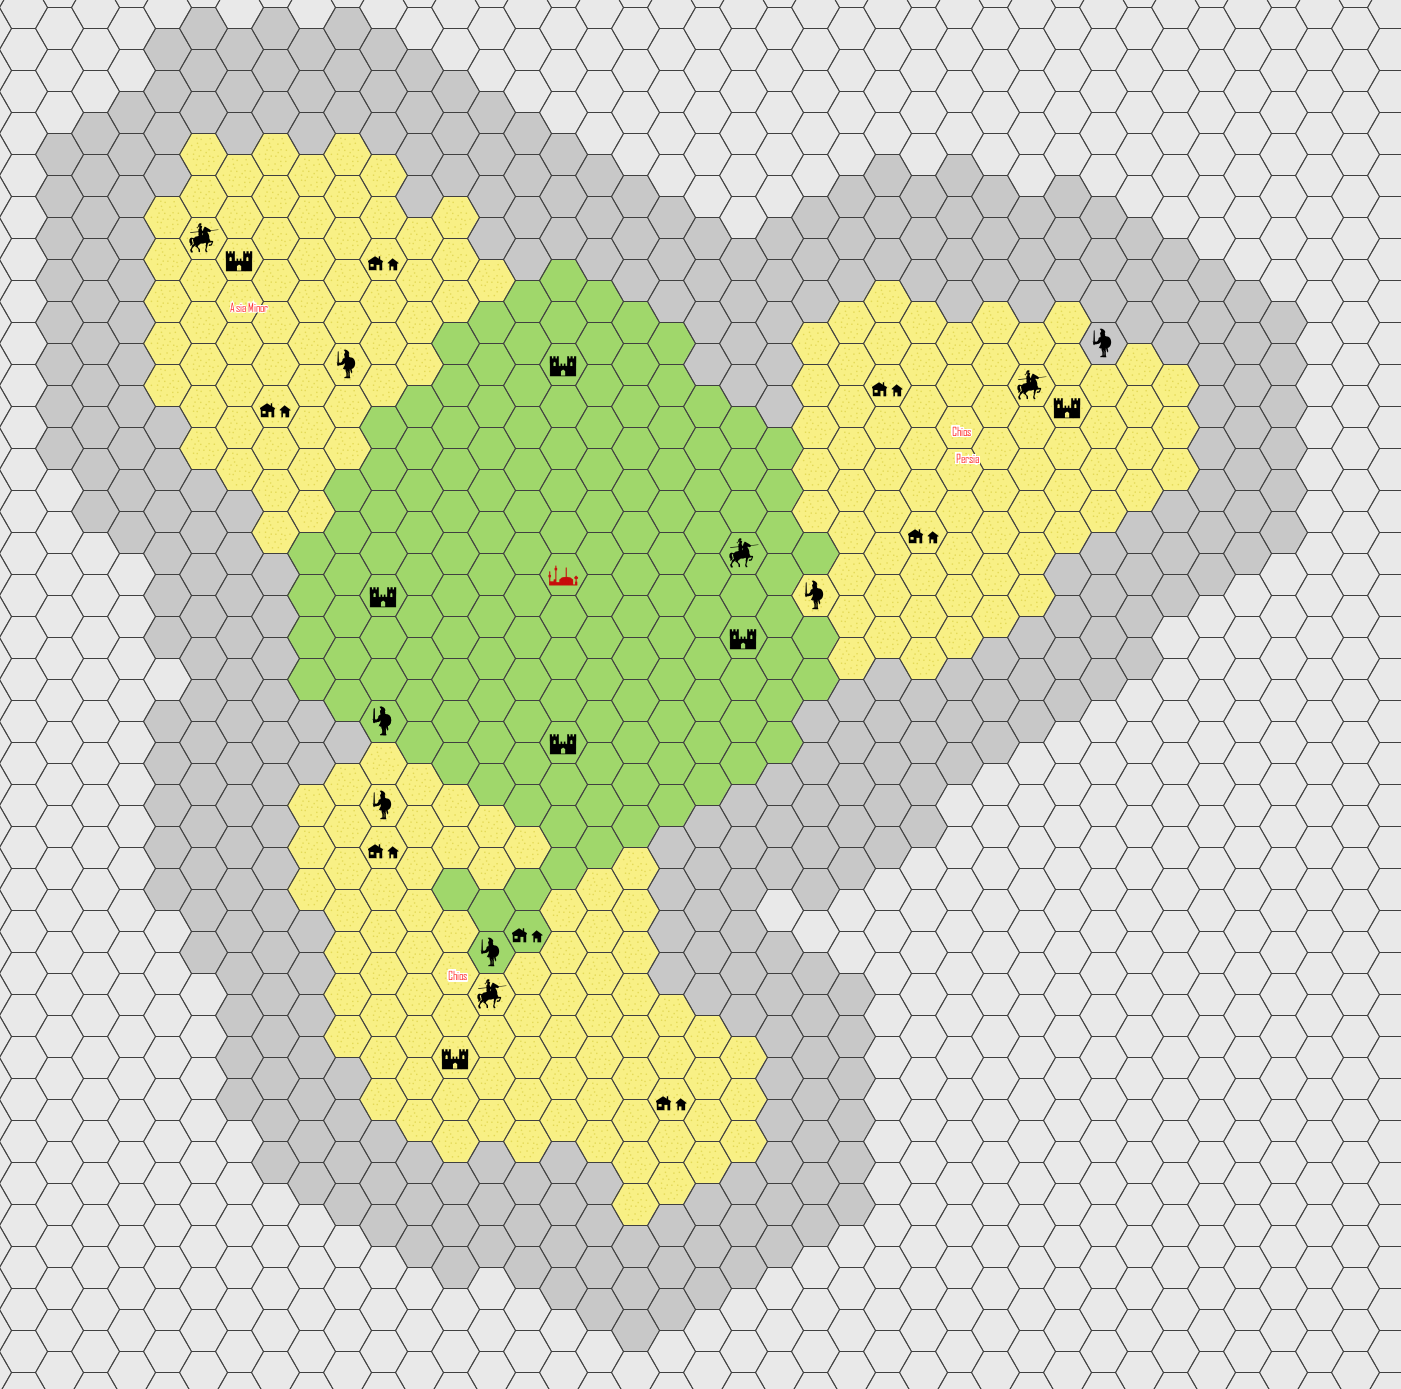 |
| Post turn 4 movement |
The only event saw good fortune for me. Persia who had declared war on me was invaded by barbarians which will keep one of their two armies occupied whilst the other is heading for one of my cities and will be adjacent next turn. I am just able to also contact my city so will fight the invader but even if I win the proximity to my city will reduce my revenue.
I do have another army threatening Chios to the south, a victory will mean I am just one more battle away from taking a second city and thus limiting Chios to the two armies it has in the field. That fourth city they founded has stopped them needing to disband an army on the loss of a second city, the war is going to be more drawn out than I had expected.
Events are really dictating my strategy. Chios gaining a fourth city is good news for me in the long run but will extend the war by quite a few turns. Worse still was the joining of alliance with Persia, now I have war on two fronts and if not for the barbarians would be facing two armies with just the one.
If I was to be invaded by barbarians or Asia Minor was to attack me I just don't have the spare troops to fight them. Rather than throwing more points into my existing armies I will have to spend most of my points on building yet another army so I have a reserve. Yep, this is sure turning out to be fun.
Very interesting campaign and a victory worthy of Alexander.
ReplyDeleteMore like Wellington as in the end it was a close damn thing :-)
ReplyDeleteThe main idea is to iron out the odd bug before launching it as a multi player campaign if I can get enough interested in playing it as such.
Ian