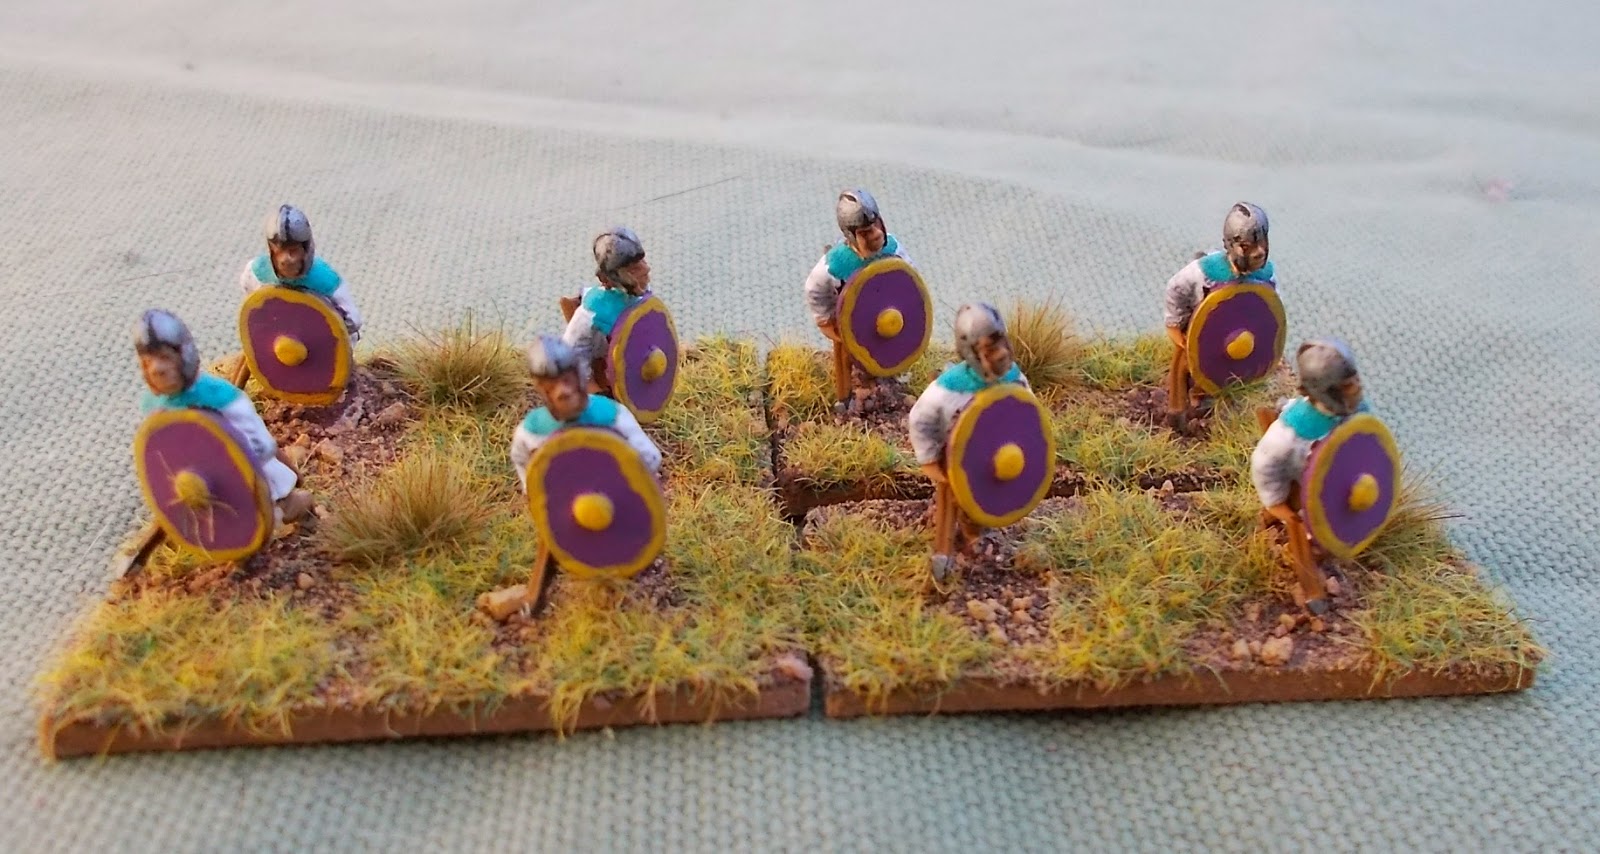
Saka Light Cavalry

Saka Light Cavalry

Saturday, 14 March 2015

Dominate Roman Light Cavalry by Essex

I have been working on getting the Roman Army finished within the challenge. Originally the aim was to get a good number painted during the challenge but as I got more and more completed I started to hope I may get it all done and if not get close to being finished. That hope may become reality if I can get some good time at the desk.

Four bases of Alan or Hun light horse with bow. Whilst I did not go for patterned clothing I went with a different base colour on all the figures so as to make the unit look as irregular as possible. Given the uniforms of all most all the other units will be the same these should stand out quite a lot anyway.

Being armed with bow and also classed as swordsmen these could be a bit of a surprise when they charge home into other skirmish units. My only quibble with these as I have with most Essex cavalry is just how slim the base is. Having to glue them to basing sticks is not something I am fond of having to do but neither is having them fall off the sticks as the mass of bluetac fails to hold the figure in place!

Equites Light Horse are armed with Javelin and Light Spear so again can have an advantage against most light troops. With these I wanted them to be a bit more punchy than the majority of the infantry and have painted up the shoulder pattern in a red colour and shields in a blue that pops. 

Indeed having looked at Kev's collection of ECW (and other fine collections) I am planning on doing a number of future projects in far bolder colours than I have used to date. The first will be the Gallic infantry awaiting in the wings for the primer arriving. Of course I have already started with a brighter pallet with the 6mm Ancients but this will be something different.

Another light cavalry unit the Illyricanti are the same as the Equites light horse but allows me two different looking units for variety. 

No matter the scale I always like to have varied colours of horses, never really like to see a full unit of cavalry with the same coloured horses. Even the Scots Greys would have different shades amongst them. Given that I painted the horse of all units at the same time I still was able to paint up batches in the same colour. The last ones I need to do is a cavalry unit, three command bases and a few baggage horses for the camp, these will be  being started tonight so maybe just maybe I will get this army finished before the end.

Tuesday, 10 March 2015

FrF73 Sledgehammers AAR

Normandy France 6th of June 1944. British commando's held the village of Lion-Sur-Mer early in the day on D-Day when they heard the sound of engines and clatter of tank tracks. Typical of many Normandy villages the buildings were made of stone and were formidable defensive locations. Just as well as a mixed force of infantry and self propelled guns had been ordered to take the village back.

British advantages, High firepower and morale troops, Hidden troops until three hexes away, PIAT v thin armoured vehicles. Good cover and open ground to fire through.

British disadvantages, Greatly outnumbered, only one MMG, facing 150MM HE SPG's

German Advantages, numbers, nearly three times the British at start force, three 150mm SPG's with ammo lorries to keep the guns supplied.

German disadvantages, Poor ELR with second line troops with too much open ground to cover. No clue what or where the British are positioned.

German's win with multi hex building control, set to a timetable that forces them to attack fairly quickly.

I set up as the British and actually made a fairly large mistake in not adequately covering the Northern (top) flank. However I had loaded the most isolated location with two and a half squads and the MMG. I figured this would be attacked in force and if it fell the buildings to the rear would be easy pickings as I would have nothing behind to stop them.

Showing no troops at the start of the game is not common, indeed it actually had both of us in fairly uncharted waters and it was to have grim consequences for one of us.

As expected Duncan went in heavy against the isolated southern building whilst trying to pin me in the middle with a second large force and the smallest force went for the northern flank. This attack was playing to my strengths whilst allowing my set up mistake to possibly amount to nothing serious.

Whilst the first shot from a half squad failed to effect the first troops in the south the MMG when it opened up caused a great deal of harm. A rate tear saw one and a half squads and the only leader in the area killed another two broken and one squad sent berserk. This squad in the following turn was reduced to a half squad and killed in close combat. The SPG was a real danger but I managed to destroy the ammo truck that was following behind stunning the crew of the SPG. Without the ammo truck the 150mm gun was bound to run out of ammo which happened before it was able to do any damage. The attack in the south first stalled then was turned away with no loss to my troops.

In the middle the Germans were making some progress and forcing me back towards the victory buildings and I had a a few breaks but even with two working SPG's Duncan was unable to get decent shots and again he was waiting for the loss of this support when I forced the last ammo truck to be recalled do to SSR. I was confident that I could hold the centre till at least mid-game, all depended on that northern flank.

I had accidentally given a route into the outskirts of the village that was not directly covered. Duncan being unaware of the position of my troops was not aware that this route was open and so was attacking slower than he needed. My only available unit in position was only able to pin one squad but fortunately Duncan was to move towards this unit rather than run round him. This allowed me to start to reposition a squad from within the village towards the threatened flank. I did not dare risking breaking the one covering unit so rather than risk moving through several hexes just assault moved with the plan to advance into a better location in the advance phase. That was put paid too when the squad was pinned in defensive fire. However even that worked out for me as the unit was only in a wooden building and as such drew more German troops towards it rather than moving away and behind. By the time it became clear it was my flanking unit I had managed to get a second squad in position to fire on the advancing German's in the open. 

At this point Duncan conceded as he had few troops in good order whilst I was due reinforcements that would finally close the door on the flanking move and the centre was firm enough to hold off the Germans until reinforced. A mix of bad luck on where Duncan attacked and ridiculous lucky rolls by me handed me the victory. On checking after the game 25% of my rolls was 4 on two D6, in a game where rolling low is a good thing and you are often firing with -1 and -2 shots due to open ground (-3 for the leader lead MMG) it was going to slant the game my way far more than skill could ever do.

The Germans lost seven squads so 50% KIA whilst I just ended the game with a half squad and a leader broken. 

End positions, Duncan tried moving a squad through the grain on the southern flank but even that was cut down. The map shows me about to advance into the two hex building next to the CX German squad. By the following turn I would have another three squads and leader in that area as reinforcements making sure the single squad would not be able to get further.

Converting to a figure battle. Plenty of open ground would be needed as the attackers need to suffer on the way in. Balance the troops so that the Germans have quite a few more than the defenders but have them of low quality and low on leadership. You may have to have special rules for the SPG's these are PzALrS(f) a 150mm gun on a old French chassis and should be slightly slower than a PzIV. Again special rules that allow the trucks to be ammo trucks and if they receive shooting that has any effect at all they drive back off the table unless destroyed. If the truck is destroyed it needs a chance to explode causing damage to any adjacent units, treat as a Goliath going off if you have rules for these.

The commandos need to be hidden until the Germans are within close range then they can be placed on table, this should make the German player to have to plan without the information most needed and if you have enough terrain on the table allow for some fun situations where the British pop up and start blazing away.

Monday, 9 March 2015

Waterloo British Starter Orders

Another 6mm post but this time Napoleonic British from Baccus and not for my Project Waterloo but for a different Waterloo game and 100 days campaign. I was asked by a mate two years ago if I would paint up his 15mm Thracian's. Sure I said, once I have finished Matt's Zulu's. Well it changed to I have some British for Waterloo as well.... Being stuck in the middle of my own Prussian and French I held out little hope of doing these but after a few months off Naps and finally with Matt's Zulu's finished I agreed to start on Steve's figures.

He needs the reserve Corp painting so as test units I did four battalions from the main army (it seemed a good idea at the time). Well after checking the units given and units required it turned out not that bad a move as I would have four battalions of regular infantry spare so would have to paint them up as something else anyway. Steve is short by three Highland Battalions and a battalion of Rifles but these are in hand.

Here we have the 2nd Battalion 30th Regiment. I am finding the yellow facings a little tough as they hide away against the flesh though you can see it in the photo OK.

This is the 2nd Battalion, the 33rd have red facings making these easy to finish with only the drummer with the extra work to do. I am finally starting to get the hang of the cross belts after how many thousand? I did not have the correct flag for this battalion but finally got the flags recently and will flag it either tonight or Tuesday, when I flag the ten new battalions finished today.

The 2nd Battalion of the 69th Infantry. I never took a picture of the other painted battalion (2nd Battalion 73rd Regiment) before handing them over to Steve so only the three close ups. Painting of the flag edges is really important otherwise the whole image is spoilt. The flags are Baccus and you can flag 12 Battalions of British for £1.50, French manage 24 battalions LOL). I add watered down PVA to the inside of one half of the flag, line it up and stick together apart from the folded edge, add it to the pole and tease it into various folds and waves. Having two flags on the same base allows for some nice effects.

These were the first British Napoleonic battalions I have ever painted and prior to painting I was quite nervous of getting things wrong but it went reasonably well, enough so that I have painted up the next ten. Will take a week off from Nap's and get back to them with the final eight Hanoverian Landwehr that will finish off the reserve infantry till after the Highlanders arrive.

Sunday, 8 March 2015

6mm Baccus Ancients

Keeping up with the 6mm painting as you would expect if you follow this blog. I started this project as a side interest and was not sure if it would go further than painting a few units up and then flogging it on. Now Lee has bought three starter armies already painted and it looks like we will get the chance to pit them against each other once he has rebased his and I have a few more units painted up. Good job then that I am on with it.All figures are Baccus.

So lets start with the heavy hitters. Not sure I will be needing four of these but if I do they are all ready. Most likely is that Lee will be borrowing a couple for his Romans. They come as a four part kit and was a little fiddly but all but one went together well, the fourth (well first) is a bit messy but that's me not the models.

These really look huge against the figures and other units, lets hope they pack a punch. I also have four of the smaller bolt throwers to paint up but I have a few other units ahead of them in the paint queue so maybe an April item?

As we are using the Hail Caesar rules and won't be removing bases we need to keep tabs on casualties. This will either be via these markers or some of the really small dice, we have to try them out and decide which will look best on the table.

Here is a Hoplite doubled over, you get 55 figures for £6 in the UK and some will grace the bases of units to add a little interest.

Another Hoplite, this one fully prone, the dials are from Warbases and are great. I already use the larger dial for Sniper Reminders, these smaller ones hopefully will be the ticket, though it's a little big for the wee guys.

Fifteen of the casualties are cavalry so I will be able to use these with the right type of dead to match the units :-)

Again another Hoplite but as this one is unarmoured I can use them for other troop types without worrying about how a clash of interest, oh how these things are important.

I also painted up four units of light javelin/spear infantry, not to be mixed up with units that only perform a skirmish duty these are also meant to fight hand to hand when required (not a good idea unless the targets light troops or in a bad way) but they still earn their keep with the javelin. 

I based these in a really open order with some troops facing backwards with others moving forward and of course some throwing their javelins. I wanted the unit to have a fluid look. I originally was thinking two bases worth but I painted up more than would look good on the bases so I doubled the units.

Here you can see some of the guys legging it! Not sure how these will fair in games but should be good for sweeping away the enemy light troops.

Looking a little alike (same pallet) these bow armed light troops have one difference, the troops whilst still in loose formation are somewhat rowed up in ranks, this was to give the volley like look that I think the more distant weapons would look. After all the enemy troops should be at a reasonable distance if possible.

As the other lights I have four units of these. Too many for a small game but when we have rank after rank of heavier infantry these will really come into their own.

Hail Caesar does have small units of true skirmishes and I have represented them the same as Kev and Andy does, on a small circle base, as you can see from the figures it's quite small and hopefully reinforces the nuisance value rather than a major player on the table.

So eight bases of skirmishers, hopefully they will drive Lee nuts. I am not sure when they will get their first outing but I do need to paint up more close order troops before I can set myself against Lee's forces, best get cracking.


Saturday, 7 March 2015

Warbases Movement Tray

I was finishing off some figures for this weeks entry into the Challenge (none of these) and thought I would have a go at dressing up one of the movement trays I bought at York from Warbases. The idea being is that I can make changes if I did not like the results.

I used the same system as I would for normal basing as I want it to look as similar as possible. I bluetacked 2p pieces into the holes before applying the masonry paint and prised them out once the sand had been added.

I also needed to use a sharp knife to clean the sand and paint out of the holes once it had dried, this allows the figures to be popped in place without having to force them into the slots risking damage to the figures.

I am pleased with the overall effect and will be doing the same to the other bases I have waiting to be done. These may get double duty as a handy storage base and for any games where we will be using shield walls once we have all of the figures we have painted up. I know one think for certain, I will be needing more of them, they do different sized ones so I have to make my mind up on amount per base.

Thursday, 5 March 2015

Essex Miniatures Roman Infantry

The Painting Challenge this year for me has been mostly about my Dominate Roman army. I did start it with one unit in last years challenge but then I dropped it to finish Project Waterloo, but with the troops for that finished I have been able to give this army far more attention.

I really like the sculpts for these figures. Unfortunately I can only have the four bases and if I do I can't use the bow or slingers. Still they can be used in different armies so all is not lost.

I really like that they don't just have the one javelin so more look the part. These will be most useful for chasing away or fighting the opponents light infantry as their limited range and small number would make them next to useless against other heavier formations.

Fairly distinctive uniforms and I must say the availability of images on the net is rather slim so much of the painting has to be based around a fairly unhelpful Osprey as few of the images are all that clear on the uniforms making me think little is actually known of the uniforms of this period.

Keeping to the same base uniform as I like the idea that both units are somehow linked, here we have a unit of Auxiliaries I went for medium rather than heavy infantry as much to have a 6 base unit as 4 base units are very fragile.

Fairly basic shields, OK very basic, these are actually brighter in colour than I at first had in mind but they are growing on me. 

Ready for battle, here they are in the role of protecting the Auxiliaries as they close with one of Rome's numerous enemies, 

A second unit of slingers, to the ones I painted near the start of the challenge. Nothing much to say about these guys as they are fairly pedestrian.

Again went with some fairly bold colours, bright shields and deep red pattern to the tunics. One of the other Roman armies from this period allows eight bases of slingers so they can be of use.

My favourite unit of the bunch, and again on the bright side. The shields as the others are taken from the Osprey I mentioned before from a set of B&W drawings with colour codes.

This almost brings to the end the infantry I have for this army, just a few more bow troops. I plan to paint these up at the same time I finish off the cavalry and camp. That will bring to a close the whole army and I hope to get this done either as the Challenge comes to a close or soon after.

Tuesday, 3 March 2015

Dark Sword Monster


My Fantasy LotR meets Wheel of Time has moved on from the orcs siege of the city they were trapped in. The Fore-Runners attacked the orcs and trollorcs just as they were capturing the city and the players were deciding to cut and run or try and get back to the inn to collect their possessions and the still comatose Isabella Sedi. 

After days of travelling south through ransacked and deserted villages and farms they finally reach a village with occupants. Seems the raiding parties had either missed the village out or had not made it this far south.

Not that the village was without it's own problems, it seemed that someone was holding the village to ransom. It all started with the odd small animal or chicken going missing but soon escalated to cows being taken in the night. Then came demands of money or worse would happen.

The village at first did not pay, they agreed to lay in wait, pretend to make payments but the plans never worked and more animals went missing and the money demands became larger. In the end the village started to pay until they were desperately short of money. The demands continued to be made and then finally people started to go missing though sometimes parts of them were left behind!

This is what the party walked into. At first it was assumed that the party was behind the problems but once the players had convinced the village elder of their trust and helped out with a payment they were taken into the villages confidence. The players managed to track a creature into the woods and had a short but sharp encounter with a humanoid creature with three horns, VERY sharp claws and the ability to speak Westron. Now they have to solve the problem before everyone in the village becomes a victim of the night caller.

I wanted the figure to have more presence than normal so added the tree trunk as the plan was always to have an encounter in the woods and as such I went for a base that was more undergrowth and mulch like. I used teabag leaves (a mix of used and fresh) to layer over the grass and ground and the tufts were the more lifeless types, no bright greens here.

The figure will only be used in this one scenario so once this is over I will have no future use for it so I am offering it to the players to have. If none wanted it then I would sell it on E-bay and use the money to buy future figures but as it stands at least one of the players wants it which is fine by me.

To give an idea of the size the cowboy is a Wargames Foundry 28mm though the difference in base size gives an advantage to the monster. Next session is fairly soon so it's possible it will have a new home soon, on the other hand we could be rolling up new characters.