
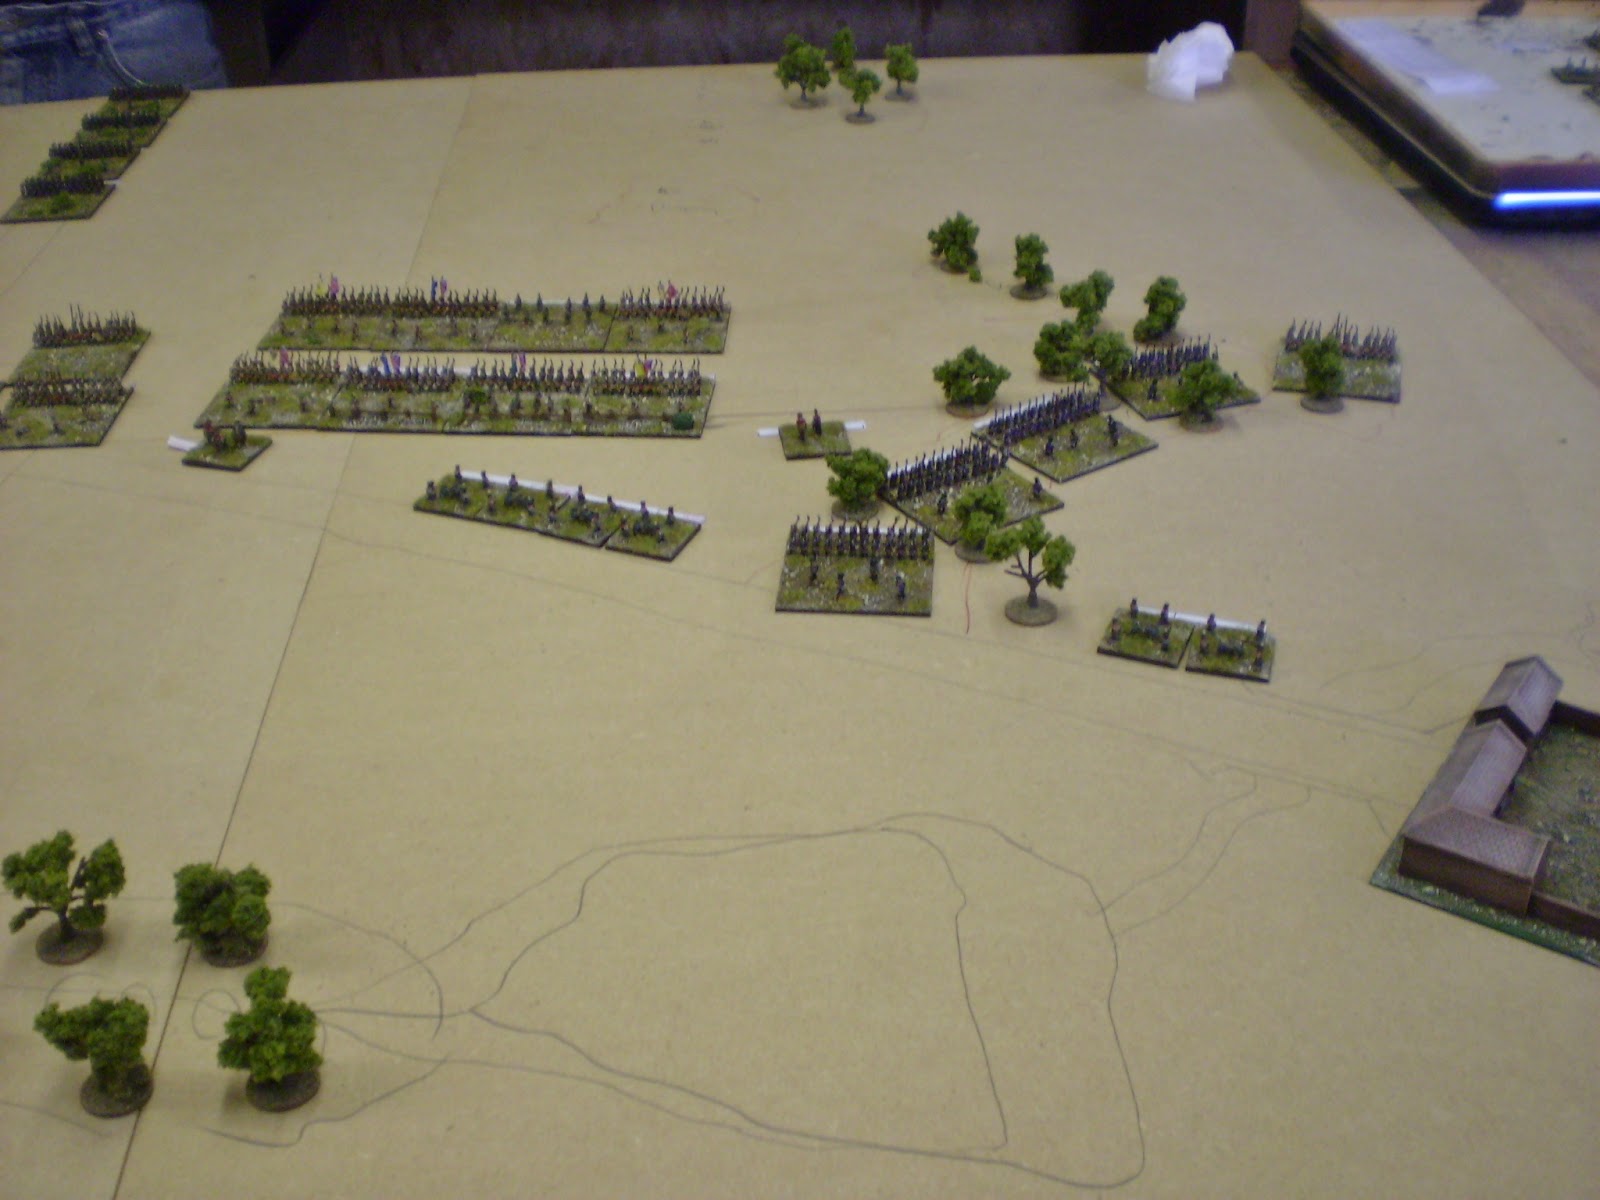
Pardon the rough look of the game but this session is just to see if we have the scale and position of the terrain correct. Also note that hills still need to be added to the boards, we felt these needed to be left out at this stage but certainly need adding.
 |
| The French all sorted and ready for action. |
Straight away we had worries about the amount of space we had. In reality this was brought up when we used tiles for units, only now it looked worse with figures on the bases.In fact we nearly stopped there and added the extra 1 foot to the centre but in the end we thought we would give it a go. Still not sure we don't need more space but we had a hell of a lot of fun and I would be interested in your views on this.
 |
| Wellington looks on. |
French are to the left of the pic and the Allies on the right. At this stage it does not look too tight but if all the terrain was finished you may think different. The buildings are taking up the approximate positions but the actual space for them will in most cases be a bigger area.
 |
| French Right Flank |
We started the battle at 3pm with the allied outposts driven back. Between the woods and the top set of buildings is the pond, a stream runs between behind the buildings into the pond and then runs on through the woods. To cross costs 1 base width of movement and disorders you, though a bridge crosses the stream.
 |
| French Centre |
The centre has the most open areas but still has a few woods and grouped buildings, it's here I intend to kick off my attack. I have a third of my infantry assigned to the job with elements of the rest available to support this attack. At the start I only face half the Brunswick force and have a good chance to force them back.
 |
| French Left |
Again on the left I am drawn up to attack, but the majority of my cavalry are behind this force though the plan is to move these through the centre as I force passage with my infantry. The main terrain feature on this side is the strategically important Boussu Woods which cut that third of the battlefield in two.
 |
| Allied Left |
The Allies started along the Namur road set back from the pond and stream but soon moved forward to defend this natural defensive line. Lee in fact acted aggressively with a good proportion of his at start forces bringing the battle to me.
 |
| Brunswick Forces forward and in the open |
Picton's Division can bee seen in the distance whilst over half of the Brunswick force is deployed against the Boussu Wood with it's guns to it's left and cavalry in reserve and some of the Dutch-Belgium's are positioned to the rear flank of the cavalry and closer support in the woods.
 |
| Allied Right Flank |
Four Dutch-Belgium battalions are formed up in the woods with cavalry behind the woods covering the route around the wood and whilst it left Lee wondering why they were so positioned later in the day it would show to have been a rather fortunate location to place them.
 |
| Allied Artillery cause discomfort |
The first unit to be forced to retire was one of mine after a couple of turns of cannon fire though this was brought back later in the game.
Quick note on the rules. Formations are activated based on selections by the owning player until one side has activated all formations then the other side gets to activate one more formation IF it has two or more formations yet to activate. This can lead to one side having a number of formations stuck and causes both players to make hard choices. Do you continue to attack where you could break through or do you rush reserves into the breach that is forming in your line? Do you gamble on your opponent picking a formation away from your weak position or play it safe? Plenty of scope for double bluffing and disaster striking JUST when you was on a roll.
The rules are designed for larger battles so results need to be quick, but that said I do not like win/lose options only. Units can stand a hard pounding and stick around or recover if taken out of the front line but they can also route in a single turn if enough force is sent their way, you will see both in this game.
Counters are used to show certain conditions as below.
Yellow = Cohesion Loss, most units have three steps of cohesion.
White = Retire, once you have gained yellow beads equal to your cohesion you automatically start to retire facing your opponent.
Red = Rout. Once you exceed your cohesion in yellow beads you route. You can not rally from route.
Blue = Disordered. You can only become disordered if crossing or moving through certain terrain types or trying to form square (only formation you have to declare)
You can recover cohesion via leader rallying which makes leaders important and useful but they can only rally units they have under their command.
 |
| Allied Cannon reaching out to me and not in a good way |
The cause of my problems to my right flank, well positioned behind the pond and safe from all but cannon fire. These guns are reaching out and causing me a few headaches.
 |
| Brunswick Attack! |
Lee tried to throw me off track by attacking into my massed columns, his guns so placed so as to inflict some nasty damage whilst most of my guns had yet to be positioned in the best positions. The attack though could not be a long term success as I was able to change worn units for fresh whilst Lee only had his cavalry for support as the British Battalions remained to the rear. As you can see from above his guns are vulnerable to their flank but note his cavalry behind them, they are about to charge and rough up the battalion on the right!
 |
| Close Quarter Action |
The Brunswick infantry did cause me a few issues but once the the first battalion was forced to retire it was just a mater of time as I now had the advantage of attacking an open flank and soon was able to start rolling up the first line. Brunswick cavalry was needed to the front and left of their position and with only two regiments on the table they had a lot to do.
 |
| Boussu Woods gets hot |
The battle for the woods just like the real battle was a see-saw action that first started to go the way of the Dutch especially when one of my battalions was hit in the flank and forced to retire but the Dutch were disordered from the woods and even in victory they were stacking up the cohesion loss. They did however put up a determined fight for a number of turns whilst the remainder of the Brunswick infantry marched up the main Quatre Bras road and towards the rear of the Dutch.
 |
| Butchers Bill |
My units are light infantry and as such do not disorder in the woods, this was proving the edge. If the central Dutch unit or the one facing my unit on the right gain another cohesion loss the line will be broken. The Dutch unit on the left only has a cohesion of 2 and has a low strength as it's just a detachment. On the other hand if Lee activates his formation and brings more troops into the fight he may roll up the flank.
 |
| Unit strengths and weakness |
Back with the unit that suffered at the hands of the cannons. You can see the three cohesion levels lost and that they are forced to retire. The 5-3-8 stands for firepower, cohesion and morale (you roll above the morale + modifiers to loose cohesion). NF means the unit is yet to fire and it's the 4th Battalion of the 2nd Legere Regiment and being in green shows you at a glance all units of that formation.
 |
| When it's gone it's gone |
The first unit to route was unsurprisingly a Brunswick battalion. It was under retire orders and before Lee could start to bring down the cohesion loss I managed to fire artillery at them causing one more cohesion step loss and rout. That's one less I have to worry about.
Routed units count as two formation route points, retiring units count as one. If your total rout points equal the number of none artillery units in your formation then the formation itself starts to retire. Formations never rout but the higher the number of points the less likely the formation will be able to get back into action. If you have enough points across your corp as units the corp will retire and so on up to army level. It gets real tight if both armies are on the edge.
 |
| Hold Firm |
Unable to attack into the teeth of the allies on the right I just take cover in Pireaumont and behind it. This looks to become a backwater as I can not attack over the stream and the allies just are not strong enough to risk forcing the town, so both sides engage in skirmish fire with the allies throwing in their artillery into the fight which suits me as it's not firing at other targets.
 |
| of traffic jams and squares |
In the centre I am struggling between the woods and built up areas, I just don't have the space to make the most of my numbers. Worse was to come on around turn three I only get to activate two formations where up to this point I had activated all my units, this makes the centre one giant traffic jam. If you look close you may spot one of my units in square (see the Irregular Miniatures square being used as a marker)
 |
| Tipping the Balance |
With the rout of the one Brunswick battalion and the roughing up of others the weight of French pressure is just becoming too much. I move the first of the Lancer regiments past my square and now it's face to face with the Belgium Lancers, who will get the chance to charge first (counter charging cavalry get a bonus but the edge is with the charger)
| Clearing the Boussu Woods |
The disadvantage of being disordered and two or more cohesion levels was enough to give me the battle for the woods. Two battalions were driven from the woods and the other two being outnumbered. The unengaged one was to fall back on his supports whilst the other is locked in melee and will only break off in rout or when forced to retire.
 |
| Rolling high is good right? |
The unit just above the dice has had a tough time, it's lost a point of morale to those dreaded British guns but Campy in an attempt to rally back the cohesion rolls boxcares. In these rules low is the aim of the game. Roll double one and gain Elite status (if elite you gain a level of morale). Roll double 6 and kiss your unit goodbye, instant rout and cross them off.
 |
| New Line Forms |
The Brunswick's did not die in vain, Picton forms up in and to one side of the woods in the centre, we are now a stone throw away but it was at a high cost as the foot artillery was taken in the flank due to being to far forward and not pulled back whilst the horse artillery was to be charged down by my lancers after I had routed the enemy lancers.
 |
| Brunswick's start to buckle |
The last of the at start Brunswick's are in retreat, Lee was to start recovering them straight away but more shots from my artillery kept them retreating but again Lee started the recovery but it would be some time before they would be of any use.
| Fresh French encroach |
The last of the forward Dutch troops retire in disorder as I bring up fresh troops and sort out my cohesion. These troops just can not be brought back into the fight until they have recovered their cohesion, if he stops them retiring but sends them in again they will all but certainly loose against my mix of fresh but disordered troops and my mostly fresh but slightly dented units. I have both numbers and cohesion advantage over the mauled allies but Lee has more Brunswick's coming up to support, will they be enough though?
 |
| Keeping me honest |
The two cavalry regiments are enough to stop me venturing out of the woods for the time being. They are light cavalry but still they can do enough to hurt me if I am caught in the open and I can't go into square in the woods. Seems the Dutch-Belgium commanders knew what they were doing after all.
 |
| Clearing the way |
My Lancers are still in excellent order but are part spent as the lance bonus is gone after the first charge, they don't get a bonus in attack but those fighting them still get a reduction to their attack as some of the lances are still available so they should be feared.
 |
| Battle Rages |
After about three hours of play the face of the battle had changed from the start. Ironically the flank that is stalled looks to have moved the most, the centre and my left flank (top of the picture) look to be the same but the allied line has been pushed back in both cases. The deciding factor looks to be in the centre. If I can punch through I can turn left and right trapping allied formations against the terrain or my holding units.
 |
| From the allied left wing |
Taking a moment to see the battle through Lee's eyes. The three units in Pireaumont look exposed and it's obvious any troops moving to help them have to brave the British guns
 |
| The Centre |
The British in a double line look strong whilst the French mass looks a mess but a very strong mess. These can spread out and hit Picton straight on, these are also not the cream of the British Army so they do need the aid of the natural defences where they have them.
 |
| The skirmishing pays off |
Lee was just starting to think the fire on my isolated units was a waste of time when he finally forced the defenders in the village to loose one level of cohesion, but this of course is easy to repair.
 |
| Long way to the front |
Success in these rules can often be down to not just having the reserves but getting them into action at the right time and place. If I break the centre I have guns cavalry and infantry ready to exploit the break in but at the moment they are standing doing nothing. Further more it's important to reorganise disrupted units and get them back in the battle, not always in the front rank but they can be quite dangerous as the second wave hitting the already bloodied enemy.
 |
| How did they rout? |
Another double six see's my second unit rout off and this time it's in a critical location, now Lee may be tempted to force the crossing and retake Pireaumont. I am confident I can get a battalion into the village before Lee can take it but holding out against that many units looks extremely difficult. Now they need to hang on as long as possible to allow the taking of the centre.
 |
| Meanwhile just to the left.... |
After some rough handling from the British guns and Brunswick cavalry I am getting the formations back into order and can consider throwing them into the woods that Picton seems to like so much.
 |
| Battery! |
With a mind to that this could well be the deciding attack I have started to assemble plenty of guns to start trying to smash the British out of the woods in the centre. I also have plenty of fresh cavalry to throw into this fight. If I can weaken Picton to the point of being close to a forced retirement I can then take it to the British Guards on the road to support. However if it takes too much out of my troops I won't have the strength to take the field from Wellington. The next 3-4 turns could be crucial.
 |
| Lancer Love |
One of my Lancer regiments has been instrumental in mauling the Brunswick's but after straying to close to the British infantry will have to slink off and try to reorder themselves before they can be thrown back in.
 |
| What's that in the distance? |
The British Guards are on the march, I wonder what they are thinking as they see streams of Brunswick troops fleeing towards them? I now don't have as much time as I would like to break Picton, seems I can't spend turns on blasting the infantry with my artillery like I would wish.
 |
| Closing with the Dutch |
At this point it was almost like a pause in the battle as I closed in on both the left and centre but was content to leave it to the musket and hard shot at this point but soon it will flare up at full power as I try and get an outcome before the forces are more evenly matched. Already Lee is reforming his spent Dutch ready to join their fresh friends. Worse still the advantage of fresh troops that can move through the woods without disorder has swapped sides, I now have to fight at a disadvantage.
So ended the first session and it looks just to be starting! As we finished up Lee pointed out one rather important fact, we had not felt the need to tinker with the rules, maybe they are about ready, that's kind of a good feeling and a little worrying as it means I am just a re-write and tidy up before releasing them on a wider audience.
Hope some of you got to the end of the AAR and feel free to ask questions and give views, especially on the space issue. I just think when we have the boards all made up it's going to be fantastic though I still expect changers and a few more playings.
Certainly sounded as if it went well overall. A good plus if you think the rules are sorted - play the game rather than the rules then - always a bonus!
ReplyDeleteLooked and sounded good to me, the space seemed right as well.
ReplyDeleteAn epic game Ian!!!!
ReplyDeleteNow that is a war-game! What a tremendous looking set up Ian.
ReplyDeleteEpic stuff Ian. Great AAR.
ReplyDeleteA very good report, easy to follow. Looking at the pictures, I don't see a problem with the spacing of units on the terrain; this is sort of a confined battle. If you want to confirm whether the space is correct of not, pick another battle, say Albuera, and set it up and see how it looks. If the rest of this game runs as well as the start, assume you've got it right.
ReplyDelete@ Dave, well the rules are our own and we feel they have the right flavour and by Blog-Con hope to have them PDF'ed for giveaway
ReplyDelete@ Fran, Thanks for the feedback, really looking forward to dressing the table next time LOL
@ Ray, it feels that way, I can see me punching through but paying a high price only to be pushed on back which would be an epic game indeed
@ Michael, yes and when you consider the big game is three times the terrain area and four times the figures, it kind of comes home a little
@ Phil, I think it will hot up a lot at the next stage as I try and beat his reinforcements to the punch
@ Mike, that's the key for me, I want us to play the game not just set it up. If someone looks at it at 10am and comes back at 12 I want them to see how it has changed but at the same time not ignore the viewers, it's one of the big pluses for Project Waterloo is that we get to play it to the end as it's not at a show and so the AAR will be over a lot of posts and hopefully will be quite something to follow
Ian