
This was the hardest test of my Napoleonic rules to date. Lee is more than a bit of a Napoleonic nut, not only has he a British Army big enough to play Waterloo but he has at leas 30,000 28mm Nap's and knowledge to back up such a force. The forces being used were based on the first game I had with Andy so I could at least measure the result against that. This time we diced with the higher roller placing a formation then roll again with a +2 to the roll for the player who had not had to place the latest units. This was a fairly quick way and suited a none historical bash. As I have yet to finalise unit strengths and assign point costs it's hard to say how even the forces were. Lee with the British had two more units with a shade under thirty units a side it was close enough to even.
Lee on having read the rules before had already sent a large number of questions, suggestions and out right I think that is wrongs. Lee it's fair to say has never been accused of hiding his view on anything. He has a definite view on what rules should do and I knew he would be quick to voice views. This is very much a good thing when play testing but still I was a bit nervous he might end up drop kicking my baby in the head.
 |
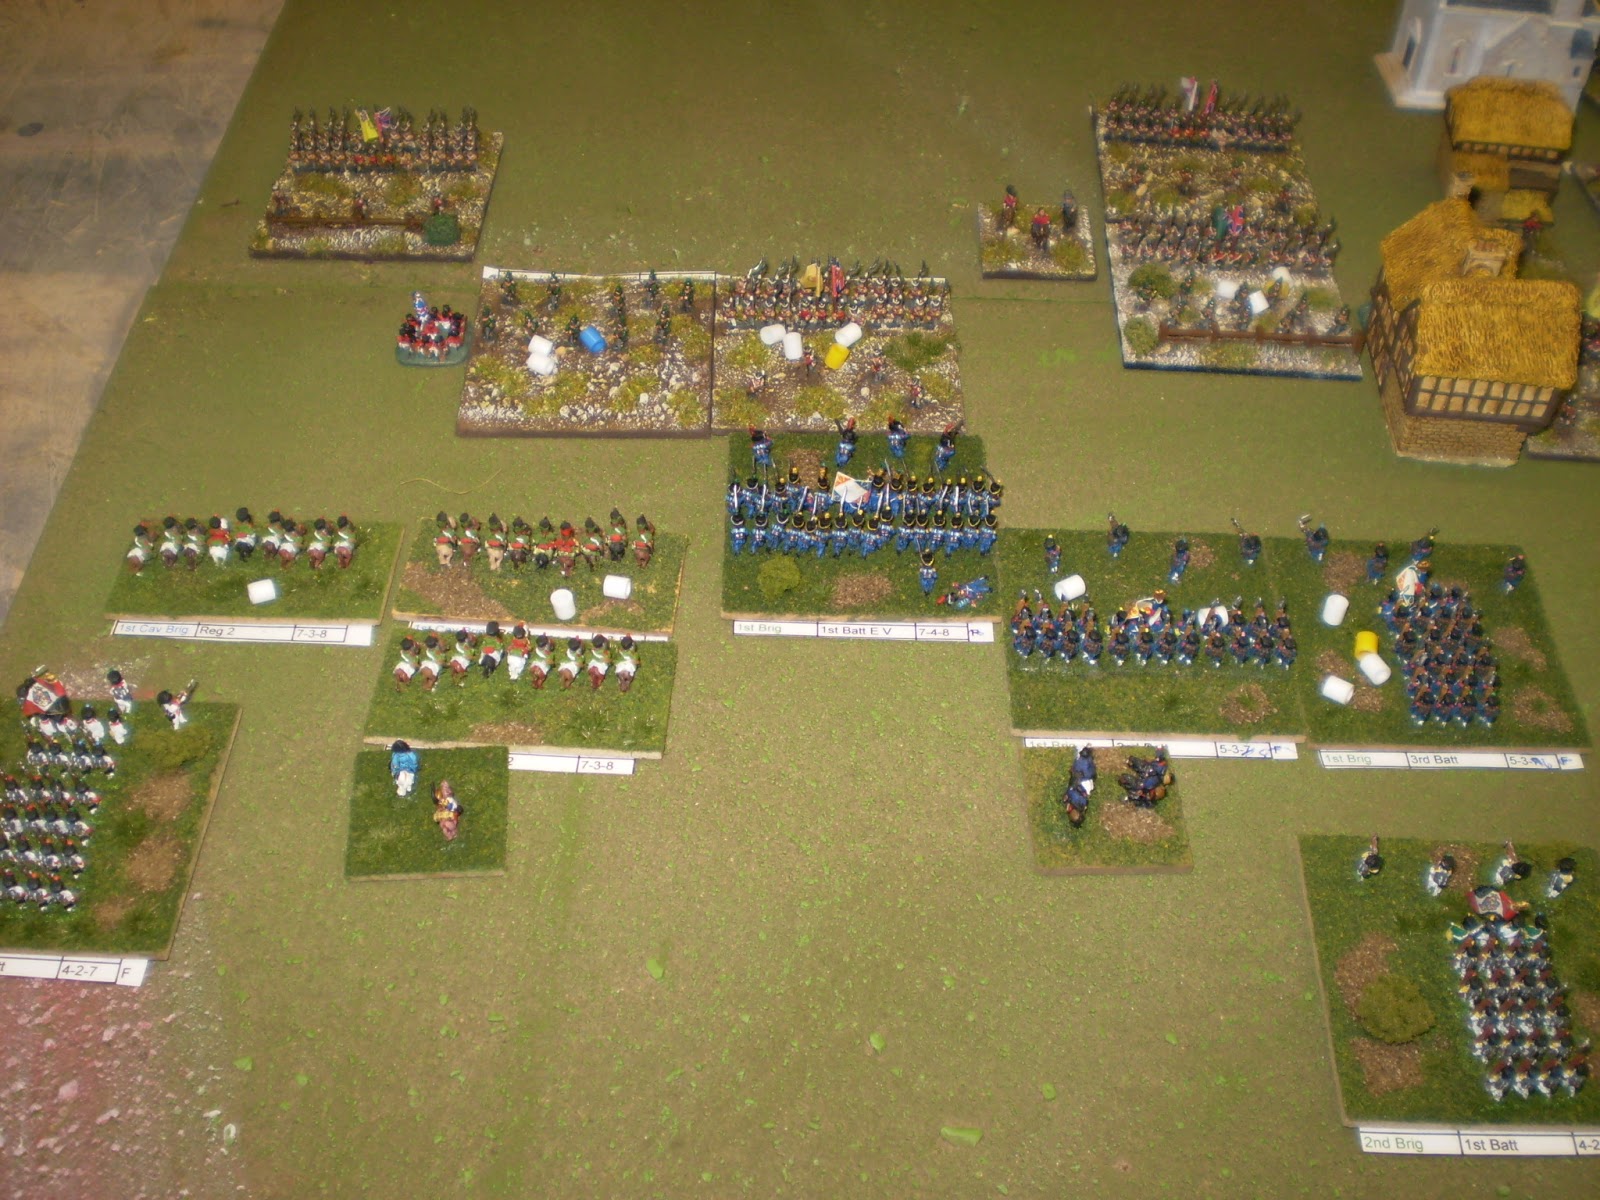
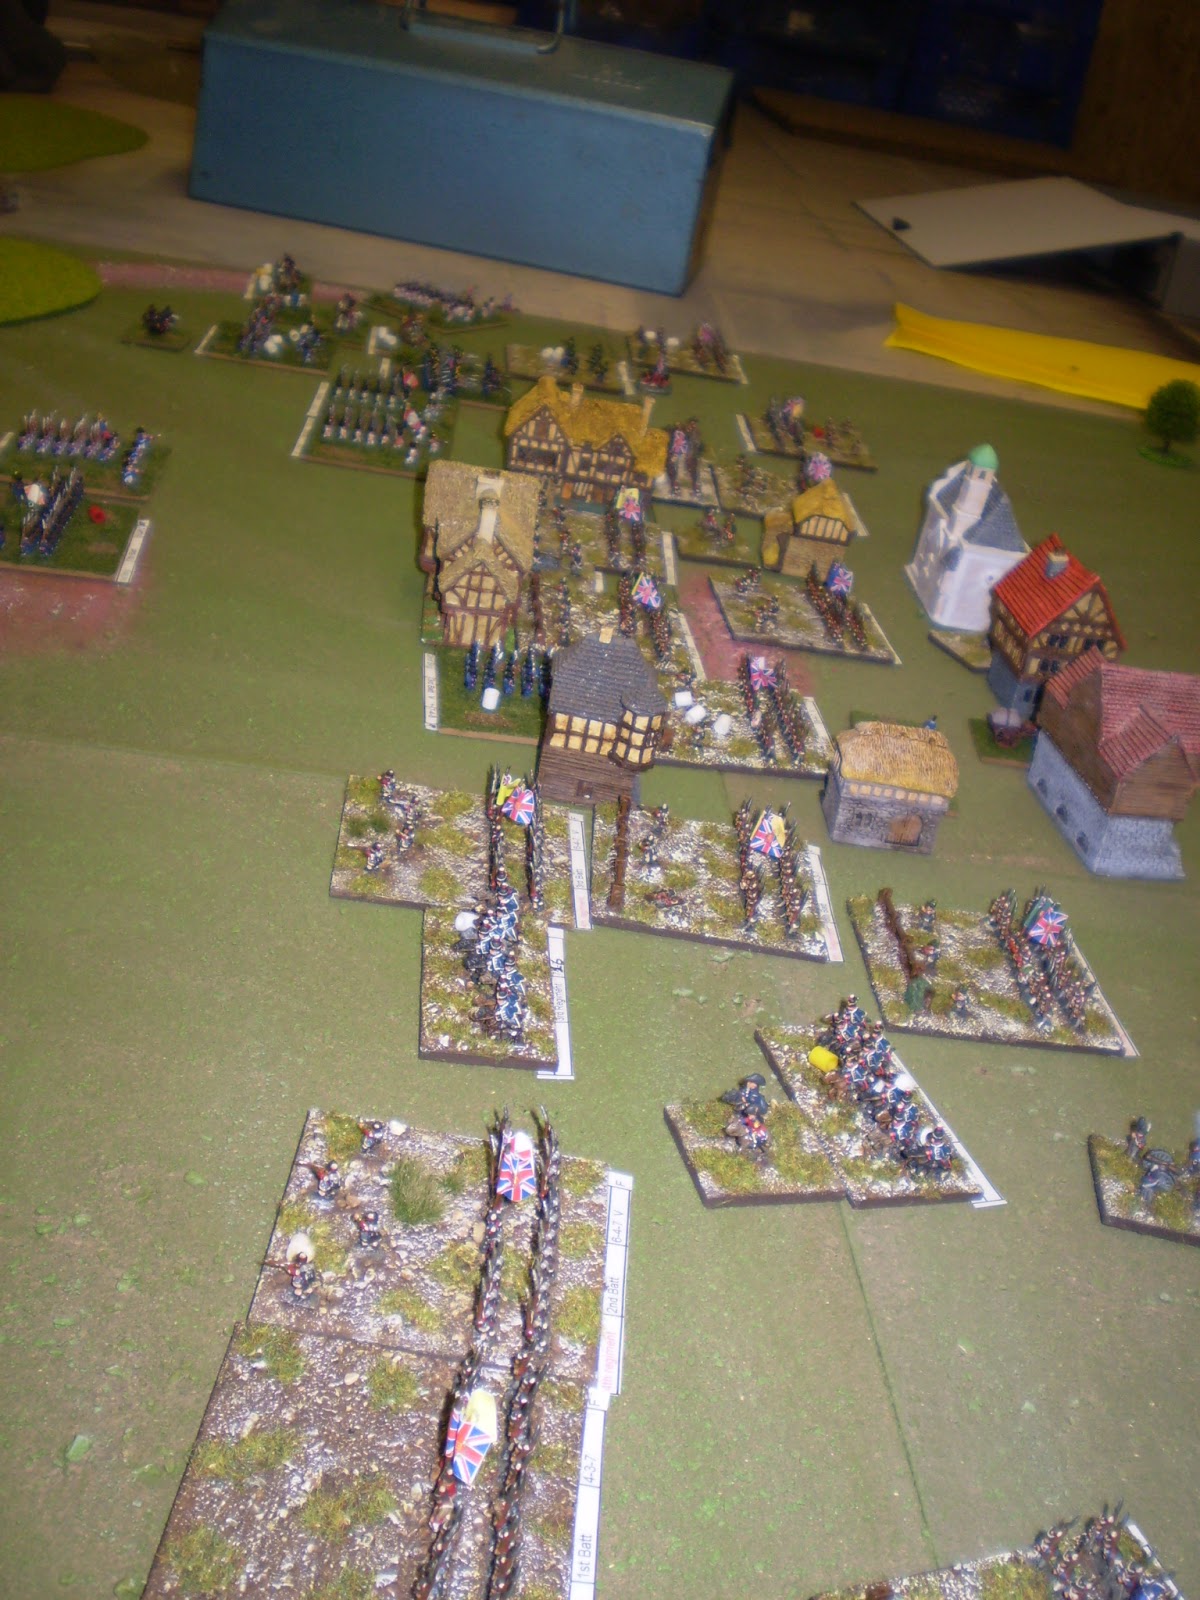
| View of my left and centre, Lee holds the town. |
 |
| My right and Lee holds the farm and field all the way to the wooded Hill |
So once we had deployed it was time to get it on. Both of us were fairly linear but both of us had some troops in reserve. As you can see from the picture above Lee was extended beyond my right flank by a good margin. The second smaller town I decided to ignore as I had bunched up on the left so I had numbers to attack the large town. Previous experience had shown getting troops out of a built up area needed plenty of troops.
This is the area that saw the first real action, not the town itself but to the side where the board edge was. I had placed four regiments of cavalry, all Hussars and moved these so as to strike at the infantry. Lee was having two foot regiments hit by three cavalry. The first to test to go into square managed to do so but only formed a disordered square which is slightly easier to break. The other square formed up with no drama. I smashed into both, the disordered square being charged by two regiments. These caused a loss of cohesion but one of the Hussars also lost a level so the result was a draw and I retire ready to charge again at the next opportunity. With the other I again test to see if I loose cohesion. I rolled double six which is a automatic rout, oh dear. Not the start I was expecting, not that I expected to win against a square but the plan was to pin him in square then have at them with the infantry.
 |
| First Blood to Lee, the red marker on the rear unit of cavalry marks a rout. |
My rules call for both players to roll for initiative for their selected formation. The formation that fails to win initiative gets a +2 to the next initiative roll if again selected for the next dice off. Every turn a formation will fail to get to move as once one player has activated all his units the other player gets to activate all but one. Lee at the start was somewhat sceptical, partly because he is used to moving all his units in a game and secondly it seemed just more messing around that was required, after all all it was doing in those early turns was robbing one formation the right to move. Lee also felt the +2 was to great a swing, especially as cavalry formations also get a +1 to the roll. We kept the +2 but converted to 2D6 from one and it felt better.
Lee also felt the negative of this rule when he was unable to move both his cavalry formations at the same time to beat up on my single formation facing them. I took advantage of this in charging down the hill into his cavalry. I needed to break a couple of these to have a chance to defend against his second formation.
 |
| Win and I punch a hole in the British centre. |
I had a single regiment of Lancers and three of Dragoons facing off against two Heavy and two Light Dragoons. The negative effect of facing troops coming down the hill and three out of the four combats supplying me with a greater chance of doing harm. This panned out as I also supplied with good attack rolls or passed any tests against cohesion or morale whilst Lee was failing these. All four combats were to go on into the next phase. It is possible for units to fight in multiple combats because if a formation attacker has yet to be activated it will fight again if in contact, or again if it charges in it's turn. By the same token a unit may be fired on by multiple formations and indeed fire back. This is intentional as careful activation of formations in the right order can bring a lot of pressure at a single point and often can reward careful and well thought out attacks. It was soon after this combat that Lee fully got this principle. I had a convert.
Lee needed to move one formation, but he wanted to make me react to another, suddenly he had a difficult choice to make, surrender the +2 just gained or risk a target slipping away. He gambled and lost out. Again I try to move on the town, I was using two guns batteries together to try and offset the protection the town was giving the British. One level of cohesion had been lost and I wanted to get into his face to prevent him regaining full cohesion.
 |
| One British regiment feels the effect of French artillery. |
Again though, the improbable double six on a cohesion test. I now in this area have lost a quarter of my cavalry and one of my best infantry regiments. I really need to force the troops next to the town to rout so I can attack the town from two sides. I start to move my worst troops into the front line.
 |
| Routers never rally so wave goodbye to another regiment. |
I get to go first in the next turn after winning a close initiative text. I select my cavalry in the centre again expecting to rout his formation . My lancers rout the Heavy Dragoons and maintain contact in the pursuit which removes them from the field. But the next combat gets very bloody as both of us do enough to force the enemy to lose enough cohesion to force a mandatory retire order. By passing a cohesion test in following turns the retire order can be removed. I then rout the next British regiment before he does the same to me (yes ANOTHER double six!!) Even so that regiment is forced to retire through casualties taken from musket fire. That's enough damage to fore the whole formation to retire which soon turned to a rout and the loss of the whole formation.
 |
| I win the cavalry battle but at the cost of one regiment routed and a second retiring. |
Now I really needed to bring the flank attack to a conclusion. The brave disordered square continued to survive as three charges were each seen off. The other square did not do so well when charged by infantry. They survived the charge but were down two cohesion levels. Once the charge combat is resolved the regiment comes out of square for future combats but the damage was done. I force him to retire in the next round whilst my regiment has suffered no loss. Must be because they are Adler?
 |
| Bitter battle on the flank |
The brave square was finally looking at disaster as I bright up the Neapolitan regiment of fairly poor quality but still fresh ready to charge. The square could stand the attack but the end is almost certainly at hand. Another regiment was also retiring giving me the space to drive forward and have units spare to turn on the towns flank.
 |
| Last Stand as I Force Passage. |
By this time Lee was able to bring his best infantry into the attack on my right. Worse still another double six saw a fairly fresh infantry unit on that flank run for the rear. Lee still had a couple of fairly fresh cavalry regiments able to help out the infantry whilst I had the lancers who were suffering two levels of cohesion loss and having charged already were without the main Lance bonus. I also had a heavy dragoon regiment that was in better shape but was refusing to regain cohesion! Things looked good for Lee here.
 |
| Quality and Quantity, does not look good for the French. |
I still had all my formations in the battle but both horse formations were vulnerable and I would need to rest them before commuting them to any further action. I would need to stall the British till I had the town secured and the defending formation in retreat.
 |
| Making the best of the Centre |
Problem was that I had almost nothing left to throw at the front of the town, true I had forced a single Regiment into the town but it's supporting regiment had been broken (not a double six this time). I needed a sudden collapse to stop Lee from repositioning the defenders.
 |
| The cupboard is bear. |
We called it at this point. We could both have carried on from here but thought it better to pack it away and start with a fresh game now Lee had a feel for the rules.
 |
| View down the line. |
As expected Lee gave great advice and suggestions and more alterations are being acted upon than any of the previous play tests. Though I am glad to say, most of the changes are factor based rather than whole rules. I still think we will tighten up a few areas. I also think that some of the area's that were still not agreed upon will again come up and hopefully be thrashed out. It was nice to see Lee get where I was coming from, though in a couple of cases I had to explain more than I thought would be required showing that a few of the concepts need to be made clearer in the rules. Lee often asked questions about why I did this or that with the rules. Not to question their inclusion but to see what I wanted to achieve. This was a really good method as it sharpened up my thoughts and also gave a Lee an insight into what I wanted to achieve and in turn helped Lee to suggest possible ways to improve or support concepts etc.
The most important result was that Lee likes the rules, thinks they work and are well worth moving forward. So much so that he intends to extend his British, wants to fast forward his Spanish, plan his Russians and try and steal the Austrian project from me. Not sure if I should start to panic yet. I still need to try Volley and Bayonet which Matt has.
An epic game Ian! A great read too!
ReplyDeleteMy goodness, seriously impressive.
ReplyDeletegreat game! though it looks like the rules need a slight tweek here and there. also the double sixes thing needs to be adressed... if you get it many times in a battle throw the dice into the fire and get some new ones and show them what will happen if they roll double six :-)
ReplyDelete@ Ray, glad you enjoyed it. Lee's terrain and basing also add a lot to the look of the game.
ReplyDelete@ Michael, Thanks, and a lot of fun too. Since then, Lee has taken a brush to his KGL and has finished the basing of another 8-10 infantry regiments.
@ Gowan, Oh yes just a few but that was the fifth playtest including another player. Worst thing was those double sixes, nothing you can do with them. I made the mistake of leaving my vice at home. I will be better prepared next time.
Ian